Did you know ceilings can consume up to 30% of a room’s visible surface? When you plan a ceiling makeover, you’ll see how bold colors, textures, and architectural details shift the space’s mood and perceived height. You’ll get practical ideas, from dramatic beams to layered lighting, that balance style with function. Ready to explore options that fit your room, budget, and taste—and decide what to try first?
What Makes Ceilings the Room’s Design Anchor
Ceilings shape a room the moment you enter; they set tone, scale, and mood. You perceive height, density, and rhythm before you notice walls. A ceiling acts as a quiet conductor, guiding light, sound, and airflow to shape daily life.
Ceiling acoustics matter because sound lands there first, influencing conversations, focus, and comfort. You feel tucked or expansive depending on its surface and depth.
Ceiling insulation matters too; you notice warmth or chill that travels from above, affecting energy use and year-round comfort.
Visual details matter: lines, panels, or textures create emphasis or restraint, while concealment keeps clutter out of sight.
In short, ceilings frame experiences, guiding how you move, listen, and relate to the whole room.
Plan First: A Ceiling Makeover Checklist
Before you pick paints or panels, map your goals and constraints first. You’ll outline function, mood, lighting needs, and budget, then measure room dimensions and any ceiling flaws.
Create a simple priorities list: acoustics, insulation, height, access, and maintenance.
Assess existing structure: joists, ventilation, wiring, and potential moisture risks.
Plan a logical sequence: diagnostics, options, costs, timeline.
For ceiling acoustics, decide if you need sound control or clarity; note preferred NRC values and placement.
For ceiling insulation, specify R-value targets, moisture barriers, and access points.
Sketch a rough layout of proposed panels, coffers, or beams, labeling wiring paths and light fixtures.
Finalize with a decision matrix, then gather samples and execute in phases, starting with structural prep and fasteners, not aesthetics.
Texture and Materials for Depth and Warmth
Texture and warmth start with tactile cues you can feel from the moment you step under the ceiling—rough plaster, woven fibers, or softly textured panels add depth without shouting.
Choose materials that echo the room’s color story, so shadows and light play across the surface rather than fight for attention.
You’ll create a cozy pull by balancing texture scale and material warmth, guiding the eye upward with intentional contrast.
Texture And Warmth
Texture and warmth transform flat ceilings into inviting spaces by layering materials that catch light and soften acoustics. You’ll feel depth when you mix smooth surfaces with tactile textures, like fabric-wrapped panels or woven fibers, paired with matte paint that diffuses glare.
Use directional lighting to highlight subtle shadows and create a cozy ambiance without overpowering the room. Introduce warmth with natural materials—pine, cork, or gypsum with a warm plaster bloom—that read rich under daylight and in evening lamplight.
Consider ceiling acoustics by integrating soft inserts that dampen echoes while preserving clean lines. Guarantee performance alongside comfort with lightweight, breathable options that won’t stress framing.
For insulation, choose discreet ceiling insulation that maintains temperature without sacrificing aesthetics.
Materials For Depth
Materials for depth come from the textures you layer and the finishes you pick. You’ll blend matte plaster with satin wood and metal accents to create tonal shifts that read as dimensional.
Think ceiling acoustics as a textural tool: woven panels, perforated gypsum, or cork help control sound while adding visual interest.
Layer subtle color shifts in panels or beams to add depth without clutter. Use moisture resistant finishes in high-humidity spaces to preserve contrast and tone over time.
Contrast light-reflecting surfaces with warmer, tactile ones to sculpt shadows and highlight architectural lines.
Keep edges crisp and joints clean, so texture feels intentional, not busy.
The result is a ceiling that reads as layered space, not a flat plane.
Bold Architectural Ceilings: Styles, Pros, and Cons
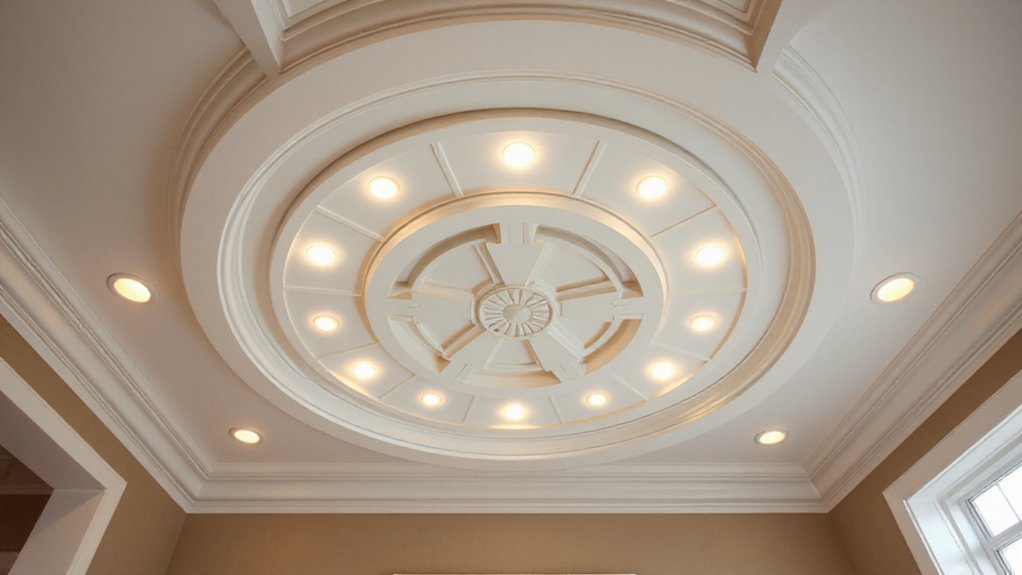
Bold architectural ceilings immediately grab attention by turning overhead surfaces into focal points. You’ll explore styles that range from dramatic vaults and coffers to subtle recessed planes, each altering space perception.
With higher ceilings, you gain airiness and drama, but consider proportion and lighting to avoid a cavernous feel. Ceiling height often dictates acoustics; introduce acoustic panels to tame echoes without sacrificing design intent.
Materials vary—plaster, wood, metal, or textiles—each delivering different textures and warmth. Decide between symmetry for formal rooms or irregular layouts for contemporary vibes.
Pros include visual impact, perceived room size, and potential resale appeal. Cons cover cost, maintenance, and installation complexity.
Balance boldness with function: guarantee access, insulation, and code compliance while keeping an understated backbone for longevity.
Dramatic Beams and Structural Statements
Dramatic beams and structural statements command the room, turning ceilings into architectural headlines. You define space with engineered lines, where soffits suspend light and texture. Exposed beams create rhythm, casting shadows that guide your eye upward, while hidden cavities add depth without clutter.
Use bold timber or crisp drywall to contrast walls, reinforcing a focal ceiling that feels intentional rather than decorative. Prioritize ceiling acoustics to keep conversations clear without sacrificing drama; consider surface treatments that tame reflections and echoes.
Integrate ceiling ventilation seamlessly, selecting vents that read as architectural details rather than afterthoughts. Pair structural elements with lighting layers—recessed, cove, and statement fixtures—to enhance the beams’ impact.
Maintain clean sightlines and purposeful spacing to preserve a refined, modern silhouette.
Color Strategy for Ceiling Impact
Color shapes ceiling impact by guiding mood and perception. You choose a ceiling color to set tone, then let accents define focus. A light, cool white expands space, making a low ceiling feel airy without shouting height; pair with minimal accents to keep calm, cohesive rooms.
For drama, a bold ceiling color creates contrast against neutral walls, drawing the eye upward and signaling intentional design. Accent hues—subtle, saturated shifts—occur around architectural details or fixtures, reinforcing theme without overpower.
Use color blocks to delineate zones: cool tones above living areas, warmer tones near seating to invite intimacy. Remember: ceiling color should harmonize with walls and floor, while accents highlight architectural features for a polished, purposeful look.
Lighting Tricks That Elevate Ceilings

Can lighting tricks truly elevate a ceiling? You’ll flip the perception of space with strategic highlights. Start with recessed LEDs along architectural edges to cast soft lines that widen rooms without glare.
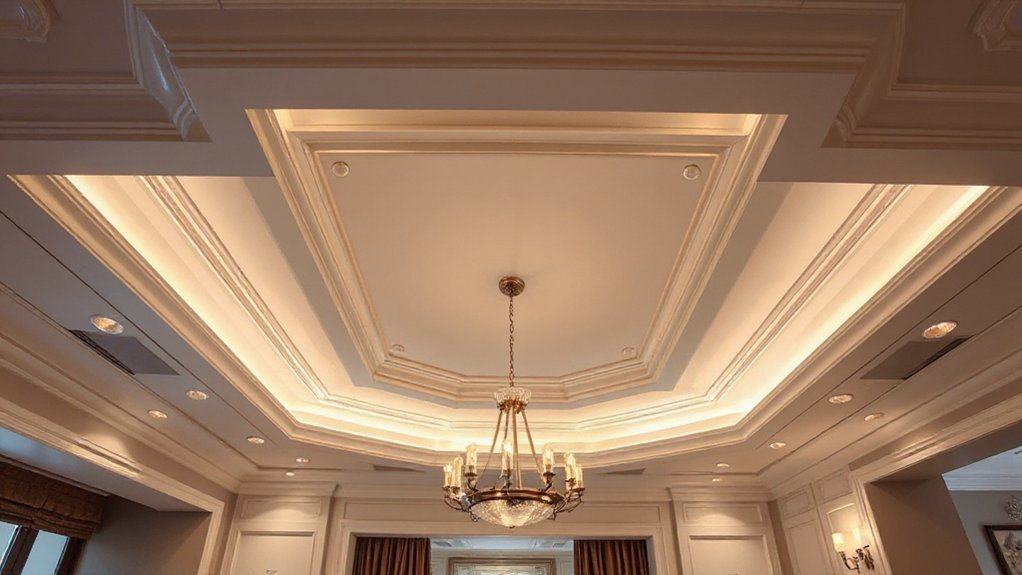
Install dimmable fixtures to shift mood from crisp task light to intimate ambience, letting your ceiling breathe. Backlit panels or cove lighting create a floating ceiling effect, adding depth where walls end.
Consider color temperature—cooler hues sharpen ceilings visually, warmer tones cozy them in. Integrate ceiling acoustics guidance by choosing panels that absorb without dulling brightness, keeping sound balanced as you brighten.
Improve function with discreet ceiling ventilation, so airflow feels seamless and invisible as you lift the room’s energy. Precision lighting, quiet performance.
Ceiling Design by Room: Living Room, Kitchen, Bedroom, Bath
Ceiling design for each room sets the mood and function, so tailor height, texture, and lighting to lived use.
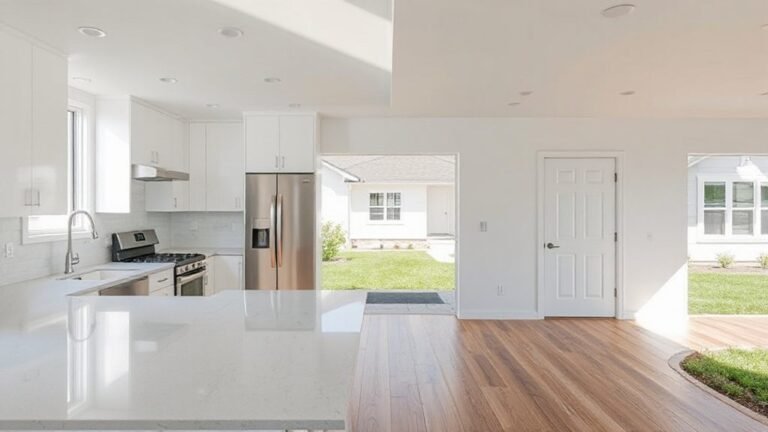
In the living room, choose a soft, unified ceiling plane to enlarge space, add acoustic panels for ceiling acoustics, and install recessed lighting that echoes wall tones.
In the kitchen, keep a streamlined profile, with moisture-resistant finishes, strategic task lighting, and subtle dimming to balance glare. Consider a lighter shade to reflect activity, plus ceiling insulation to curb heat transfer from cooking zones.
In the bedroom, favor calming tones, angled or tray ceilings for dimension, and quiet fixtures to support rest. Include sound-absorbing materials for ceiling acoustics.
For the bath, select moisture-safe textures, moisture-rated venting, and reflective surfaces to brighten. Guarantee proper ceiling insulation around plumbing for comfort.
Budget-Friendly Upgrades That Punch Above Their Cost
You can elevate ceilings without breaking the bank by choosing budget-friendly materials that look premium.
Try bold DIY ceiling accents, like stenciled details or simple geometric panels, to create visual drama.
Use smart paint tricks—contrast colors, metallic sheens, and crisp edges—to amplify impact without overspending.
Budget-Friendly Material Picks
Budget-friendly ceiling upgrades can deliver big drama without breaking the bank. You’ll choose materials that look luxe without the price tag, prioritizing texture, reflectivity, and install ease.
Think gypsum boards with smart joints for a seamless surface, or lightweight plywood panels painted in a high-gloss or matte finish to mimic premium panels.
For ceiling acoustics, consider perforated wood tiles or fabric-wrapped panels behind lighting to soften sound without heavy investment.
Ceiling moldings can add architectural interest even on flat ceilings, using simple crown profiles or faux beams that install with minimal carpentry.
Laminate or vinyl-backed ceiling tiles offer resilience and variety, while painted plaster swirls provide dimensional depth.
End results feel curated, cohesive, and noticeably upscale.
DIY Ceiling Accent Ideas
Add a few standout accents to your ceiling and instantly elevate the room without a big spend. DIY ceiling accents are doable, neat, and dramatic when chosen with purpose.
Start with ceiling art—a single oversized mural panel, geometric decals, or a framed gallery grid that mirrors your wall style. It draws the eye upward and creates a focal point without remodeling.
Next, consider Acoustic panels, not just for sound but for texture and rhythm; mount them in a staggered pattern or a bold color block to inject personality while softening echoes. For easier installation, opt for peel-and-stick options or lightweight foam tiles.
Keep color cohesive with walls, then finish with subtle lighting to highlight the new ceiling details without overpowering the space.
Paint Tricks For Impact
A bold, affordable ceiling can transform a room, and the trick is in the paint. You can create impact with smart ceiling painting that plays with shade, sheen, and lines.
Use a lighter ceiling to lift a low ceiling, or choose a bold hue to anchor the space and frame architectural details. Flat finishes minimize glare, while satin adds subtle depth for color contrast.
Try a white lid with a darker rim for a defined perimeter, or invert for dramatic drama. Consider a single accent color in a corner or beam to draw the eye upward.
Balance between ceiling color and wall color is key; keep the palette cohesive to avoid chaos. Ceiling painting, color contrast—done right, you’ll notice the room transformed.
Visualizing Your Ceiling Makeover: Planning, Tools, and Next Steps
If you want a clear plan for your ceiling makeover, start with a visual map that shows color, texture, and lighting ideas side by side. You’ll sketch zones for overhead elements, noting how each option affects mood and acoustics.
For Ceiling acoustics, mark panel types, spacing, and absorption ratings, then compare visual impact with practical sound performance.
Next, list ventilation options—diffusers, vents, and bypass designs—and plot air movement, noise levels, and maintenance needs.
Gather a compact toolkit: tape measure, laser level, sample swatches, and a planning app or mood board.
Create a step-by-step timeline, from concept to material orders, to avoid backtracking.
Finally, confirm lighting layers, ceiling height tricks, and finish choices, then schedule a trial install in a small area before full adoption.
Frequently Asked Questions
How Do Ceiling Plans Affect Room Acoustics and Comfort?
Ceiling plans impact acoustics and comfort by guiding reflections, diffusion, and absorption. You’ll optimize Soundproofing techniques and lighting integration, reducing echoes while brightening spaces, so you experience smoother voices, clearer dialogue, and a cooler, more inviting ambience.
Which Ceiling Design Adds Resale Value Most Effectively?
Ceiling lighting and decorative moldings add resale value most, you’ll notice. Think of a well-lit ceiling like a spotlight on craftsmanship; decorative moldings frame it, signaling quality, boosting perceived value and buyer confidence in every room you present.
What Are Budget-Friendly DIY Ceiling Upgrade Ideas?
You can upgrade on a budget with DIY paint finishes and decorative trims, transforming your ceiling fast. Try matte white for a clean canvas, add metallic accents, and install decorative trims to create depth and visual interest.
How to Choose Ceiling Materials for Moisture-Prone Spaces?
Choose moisture-prone-space ceiling materials by prioritizing moisture resistant paints and decorative ceiling tiles that resist humidity. You’ll prevent peeling and mold, while adding texture and depth, keeping surfaces stylish, durable, and easy to clean in damp environments.
What Are Common Mistakes to Avoid in Ceiling Renovations?
Ever thought about this: common mistakes to avoid in ceiling renovations? You’ll misgrade lighting fixtures, pick wrong ceiling colors, neglect ventilation, ignore moisture risks, skim carpentry, and rush permits. Plan precise layouts, test finishes, and verify measurements.
Conclusion
You can transform any room by treating the ceiling as a design centerpiece, not an afterthought. From bold coffers to soft acoustic inserts, top-to-bottom planning pays off. A striking stat to weigh: rooms with layered lighting feel 23% more inviting than those with single fixtures. Start with a clear vision, then mix texture, color, and light to sculpt mood and scale. Track costs, sketch options, and test samples—your ceiling could redefine the whole space.