Think of your kitchen reno as laying the foundation for years of daily life. You’ll want to confirm scope, timeline, and costs up front, and ask about licenses, warranties, and permitting. Find out how they source materials, handle lead times, and build in contingencies. Clarify communication, trade coordination, and how surprises are priced. Stay practical and probe deeply—the next questions will set expectations, prevent surprises, and keep your project on track from start to finish.
Define the Kitchen Renovation Scope and Milestones

Before you start demolition or ordering materials,锁 establish the scope of your kitchen renovation and set clear milestones. You’ll map it from the ground up, focusing on practical outcomes like improved workflow and durability.
Start with the overall goal, then break it into phases: design, permitting, sourcing, and installation.
Define your Kitchen layout early to ensure doorways, traffic flow, and work zones are logical and efficient. Plan appliance placement so you minimize travel and maximize safety, accessibility, and ventilation.
Specify exact material substitutions, finish levels, and delivery timelines to prevent scope creep.
Establish milestones with concrete criteria—permits approved, cabinets on site, counters cut, and the happy path to completion.
Document decisions in a living scope to keep everyone aligned and accountable.
Build a Realistic Budget With Contingencies
Set up a contingency fund upfront and specify how much you’ll reserve for unexpected costs, so you’re not caught off guard when changes pop up.
Break down the budget into realistic cost components—materials, labor, permits, and finish-outs—and assign conservative estimates to each.
Plan for hidden or rise-in-costs by outlining a clear process for approving and funding changes as they happen.
Contingency Fund Allocation
Allocating a contingency fund is essential to keep your kitchen renovation on track when surprises pop up. You’ll define a practical amount, tied to scope, materials, and labor risk, so you’re not chasing funds mid-project.
Start with 10–15% of your total budget for contingencies, then adjust based on complexity and your tolerance for changes.
Document how you’ll use this fund: who approves alterations, what qualifies as a justified expense, and how you track balances.
Practice contingency planning by creating a separate line item and a transparent approval process.
Build in budget flexibility by setting thresholds that trigger reallocation rather than halting work.
Regularly review the fund with your builder, updating forecasts as decisions unfold, so you stay informed and in control throughout the renovation.
Realistic Cost Breakdown
Creating a realistic cost breakdown starts with a precise scope of work and a clear materials list, then building in a thoughtful contingency plan. You’ll set a baseline by itemizing cabinetry, appliances, fixtures, lighting, hardware, and finishes, then add installation and disposal costs.
Next, price each line item using current market values and add 10–15% for labor variances and subcontractor coordination. Include design trends as a reference point, but lock in preferred options to avoid scope creep.
Track material sourcing timelines, lead times, and warehouse vs. on-site delivery to prevent delays. Build in contingency for change orders, delivery delays, and permitting when applicable.
Regularly compare bids, document assumptions, and update the budget as decisions consolidate. Maintain a living document to stay aligned with your design goals and constraints.
Unexpected Expense Planning
Renegotiating a kitchen renovation budget starts with acknowledging that even the best-laid plans hit bumps. You’ll build a cushion by listing potential unexpected expenses and tying each to a trigger, not a guess.
Start with a detailed cost estimation that separates fixed costs from variable ones, then add a contingency fund—typically 10–20% depending on project complexity.
Track material shortages, permit delays, and change orders as separate line items you review weekly.
Create a policy: any nonessential upgrade requires pre-approval before you incur it, so surprises stay manageable.
Use historical data from similar renovations to calibrate your forecast, and document every adjustment.
Finally, rehearse your contingency plan with the builder so you know exactly how to respond if costs exceed projections.
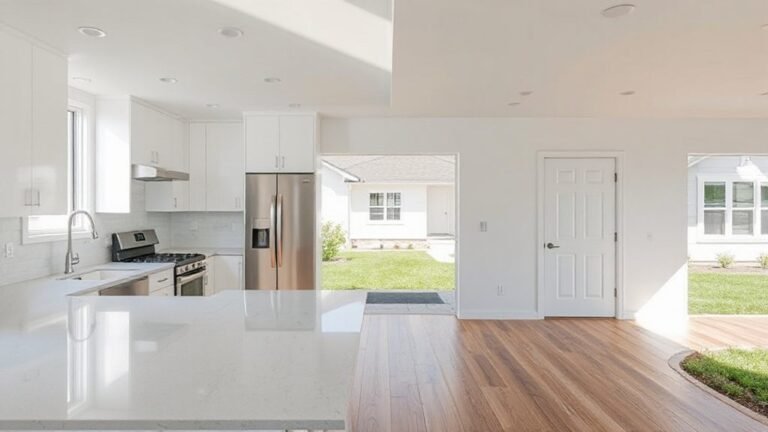
Materials and Finishes: What We Recommend and Why
When choosing materials and finishes for your kitchen renovation, focus on durability, moisture resistance, and ease of maintenance. Then balance these practical needs with your style and budget.
You’ll want material durability to matter in high-use zones like counters and backsplashes, where heat, spills, and abrasive cleaning test performance.
For finishes, prioritize low-maintenance options that resist staining and warping, while still offering the look you crave.
We recommend solid-surface or quartz counters for longevity, ceramic or porcelain tile for reliable moisture resistance, and thermofoil or matte laminate cabinets for cost efficiency without sacrificing durability.
Finish selection should favor back-painted glass accents sparingly to avoid high upkeep.
Pair with sealed edges and proper ventilation to protect investments.
Timeline: Permits to Handover, A Step-by-Step
Securing permits and coordinating a smooth handover isn’t something you can wing—it’s a step-by-step process that keeps your project on schedule and your space compliant. You’ll map milestones from permit approval to final punch list, so you stay ahead of delays.
Begin with documenting scope, then align with your contractor on a realistic timeline that buffers for inspections and material lead times. Track each phase: design finalization, ordering, site prep, rough-in, and cabinet installation.
Maintain clear channels for approvals and change requests to avoid backtracking. Prioritize material selection early to avoid hold-ups and confirm delivery windows.
Build in design flexibility so adjustments won’t derail the plan. A precise schedule lowers risk and ensures a smooth, on-time handover.
Warranties and Post-Project Support for Kitchens
Warranties and post-project support for kitchens should be set up before work begins, so you know exactly what’s covered and for how long. Start by confirming warranty coverage on workmanship, cabinets, countertops, plumbing, and electrical work, including what triggers a claim and who handles it.
Ask for written specifics: duration, conditions, exclusions, and any required maintenance to keep coverage valid. Clarify who provides post project support, response times, and limits on on-site visits or remakes.
Guarantee you receive a single point of contact for issues, and document all communications. Verify transferability if you sell or lease soon after completion.
Finally, request a service window for follow-up checks, and a clear process for dispute resolution to avoid ambiguity later.
Managing Changes: Process and Pricing

You’ll want clear change-order transparency so you can see exactly what triggers a cost and how it’s approved.
We’ll discuss timeline impact and pricing flexibility, so you know when to expect updates and how those changes affect your budget.
This starts with setting a defined process for submitting changes and a predictable method for estimating, approving, and recording them.
Change-Order Transparency
How you handle change orders can make or break a kitchen reno, so start by confirming a clear, written process for requests, approvals, and pricing. You should specify who can initiate changes, the required documentation, and response timelines to prevent drift.
Tie every change order to a fixed, transparent cost structure—itemize labor, materials, and subcontractor fees, with a change-units rate schedule for quick estimates. Maintain a centralized log updated in real time, and require written sign-offs before work proceeds.
Communicate potential impact on milestones and sequencing, and reserve contingency funds for unforeseen shifts. When discussing design trends and material sourcing, set expectations up front about substitutions and lead times.
This proactive framework minimizes surprises and keeps your project aligned with budget and quality goals.
Timeline and Pricing Flexibility
To keep a kitchen reno on track, establish a flexible timeline paired with a transparent pricing plan from day one. You’ll want a clearly defined change process with staged approvals, so midstream shifts don’t derail progress.
Ask for a detailed schedule that includes lead times for materials, delivery windows, and crew availability, prioritizing scheduling flexibility. Require contingency buffers for delays and weather, plus a policy for price adjustments tied to scope changes.
Discuss material durability upfront to prevent costly substitutions later. Insist on itemized cost breakdowns for all trades, with unit rates and a re-bid clause if requirements shift markedly.
Confirm a single point of contact for updates, and set regular touchpoints to review progress, costs, and potential risks, ensuring quick decision-making and minimal disruption.
Design Input and Trade Coordination Explained
Design input and trade coordination are the backbone of a smooth kitchen renovation. You’ll set clear guidelines for materials, layouts, and finishes, then align your team’s efforts with real-time decisions.
Start by clarifying design goals, budget constraints, and preferred timelines so everyone operates from the same playbook.
Maintain tight design collaboration with your designer, cabinet maker, and installer to prevent changes that cascade into delays.
Establish a single point of contact for decisions and approvals, speeding responses and reducing miscommunication.
Build a practical schedule that includes lead times, ordering windows, and contingency buffers.
Prioritize trade scheduling to avoid overlapping trades in tight spaces, and plan for on-site sequencing that minimizes downtime.
Regular check-ins keep progress transparent and prevent costly rework.
Credentials, Insurance, and Permitting You Should See

Do you truly know who’s backing your kitchen remodel? Here’s what to verify before you commit.
Start with credentials verification: confirm licenses are current for your state and trade, and ask for issuing boards or state IDs. Check affiliations with professional groups or third-party certifiers, as these reflect ongoing training.
Then review insurance coverage: request a certificate of insurance showing general liability and workers’ compensation, plus subcontractor coverage if applicable. Confirm the policy names you as an additional insured and lists the project address.
Finally, confirm permitting readiness: ask whether the builder will pull permits, manage inspections, and handle code compliance. If any item seems vague, get written confirmations and timelines to avoid surprises during construction.
Keeping Communication Clear Throughout
Keeping communication clear throughout the project isn’t optional—it’s essential for a smooth kitchen renovation. You’ll set expectations upfront, define milestones, and review progress weekly. Establish a primary contact and adopt a shared platform for updates, photos, and change requests.
When decisions arise, document them in writing, including who approves and the deadline to respond. Discuss potential conflicts early, such as lead times for Color schemes or appliance selection, so you’re not surprised by delays. Create a simple escalation path for urgent issues, and log any deviations from the plan with clear justifications.
Schedule confirmations before shipments and rough-ins, and recap decisions after site walks. This disciplined approach minimizes miscommunication and keeps the project on track and aligned with your vision.
Frequently Asked Questions
How Do You Handle High-Traffic or Shared Kitchen Spaces During Renovation?
We’ll implement traffic management by creating clear, guarded routes and scheduling noisy tasks during off-peak times, minimizing disruption. You’ll maximize space utilization with compact storage, temporary workstations, and prioritized zones, keeping pathways open and safety at the forefront.
What’s Your Change-Order Process for Design Disagreements?
You’ll start with clear change orders that document design disagreements, implement design flexibility, and lock in decisions quickly. You’ll track impact on timeline, communicate Budget adjustments transparently, and authorize revisions only after review and mutual agreement to avoid scope creep.
How Do You Protect Existing Plumbing and Electrical in Place?
You’re protected: we carefully shield existing plumbing and wiring with barriers, shutoffs, and careful routing. Before work begins, expect a plumbing inspection and strict electrical safety checks to prevent leaks, shocks, or outages throughout the project.
What’s Your Policy on Subcontractor Substitution and Oversight?
You’ll require clear subcontractor substitution policies and active oversight, with documented approval processes. Your contractor should verify credentials, manage substitutions promptly, and guarantee material sourcing remains consistent, minimizing delays. You’ll insist on updated credentials and transparent substitution tracking for reliability.
How Do You Ensure Minimal Dust and Debris Disruption Daily?
Imagine you’re stepping into a sunlit kitchen clouded by dust—you won’t. We control dust and debris daily with containment, HEPA vacs, and sealed waste; dust control and debris management keep disruption minimal, neat, and predictable for you.
Conclusion
As you wrap up, picture your kitchen finally humming like a well-oiled machine: drawers glide, lights glow, and mornings feel effortless. You’ve mapped scope and milestones, locked in a realistic budget with a smart contingency, and chosen finishes that age gracefully. With clear timelines, trusted warranties, and a transparent change process, you’re steering calmly through permits, trades, and surprises. Stay proactive, keep communication tight, and watch every detail align to deliver the space you envisioned.