You probably don’t realise how much of your heat loss happens through walls and floors before you even heat the air. Start by fixing insulation and airtightness, then move to smarter controls and efficient heating, because each step compounds savings. Want a clear plan and realistic costs that won’t derail your budget? There’s a practical path that balances comfort, cost, and EPC uplift—let’s map it out.
Start With Insulation: Cut Heat Loss Before Anything Else

Start with insulation to cut heat loss before anything else. You’re aiming for steady, affordable comfort, so you lock in warmth where it matters most.
Begin by understanding thermal bridging—that heat sneaks through gaps and structural elements—and choose insulation materials that address these weak points.
Opt for continuous coverage over walls, ceilings, and floors, and seal joints to prevent cold drafts.
In older homes, prioritize loft insulation, cavity or solid-wall options, and underfloor measures where feasible.
Choose materials with proven R-values, long lifespans, and compatibility with your existing structure.
Don’t get overwhelmed by complexity; a simple plan beats delayed action.
With targeted insulation, you’ll feel cozier, reduce energy bills, and strengthen your home’s energy performance and sense of belonging.
Improving Airtightness Without Damp Risks
To boost airtightness safely, you’ll tighten gaps and joints with proven materials while avoiding over-sealing that traps moisture.
You’ll want damp-risk prevention baked in—continuous ventilation and controlled air flow prevent hidden mold.
Balance the ventilation so you gain efficiency without compromising indoor air quality or comfort.
Airtightness Gains Safely
If you’re aiming to improve airtightness without inviting damp, start with a clear plan and targeted measures. You’ll focus on reducing air leakage while keeping moisture in check, using proven sealing techniques and careful detailing around joints, penetrations, and service zones.
Prioritize mechanical ventilation with heat recovery (MVHR) or balanced systems to manage humidity without compromising comfort. Inspect walls, floors, and ceilings for gaps, then seal with appropriate materials—smoothed tapes, caulks, or mastics—matching substrate and movement.
Choose breathable, compatible products to avoid trapping moisture. Test progress with simple airflow checks and a mid-project review.
Maintain indoor air quality by ensuring filters and fans operate correctly. With disciplined construction hygiene and ongoing monitoring, you’ll achieve tighter envelopes and safer, more comfortable homes.
Damp Risk Prevention
Protecting airtightness without inviting damp starts with proactive moisture control baked into your plan. You’ll install solid moisture barriers at typical trouble spots—around basements, damp-prone walls, and any penetrations—to slow moisture ingress without compromising depth of insulation.
Choose breathable, vapor-permeable materials where appropriate to let condensate escape, while still blocking bulk water. Pair barriers with precise detailing: sealants, flashings, and airtight tapes applied consistently at joints and floor junctions.
Prioritize damp risk prevention through sensible interior-humidity management, using dehumidification where needed and avoiding excessive interior moisture sources.
Combine these steps with regular inspections for signs of moisture buildup, promptly addressing any intrusion. This approach protects airtightness, supports long-term energy gains, and reinforces a shared commitment to safe, comfortable homes.
moisture barriers, mold prevention.
Ventilation Balance Tips
Are you balancing ventilation to boost airtightness without inviting damp? You can improve air quality and maintain comfort by tuning occupants’ routines and plant efficiency, not by overhauling the whole system.
Start with airtightness targets that align with your building fabric, then set realistic ventilation rates based on occupancy and use.
Use trickle vents or continuous mechanical extraction at low, steady levels to avoid drafts and condensation pockets.
Regularly seal unintended leaks around doors and service penetrations, but keep designed intake paths clear for fresh air.
Schedule maintenance to prevent filter blockages and ensure heat recovery units operate efficiently.
Communicate changes to household members so everyone understands the balance between comfort, air quality, and energy use.
This practical approach reinforces belonging while safeguarding performance.
Smart Heating Controls for Quick Savings
Smart heating controls can trim energy use quickly without sacrificing comfort. You’ll feel the benefit the moment you adjust how you heat your home. Start with Smart thermostats that learn your patterns and reduce waste when you’re out or asleep. They’re easy to install, and many models integrate with mobile apps so you can tweak temps before you arrive.
Next, set heating zones to avoid heating unused rooms. Zone control means you pay for warmth where it matters, not in every corner. Pair thermostat schedules with door/window sensors to prevent heat loss from drafts.
Keep calibration simple: a weekly review helps you fine-tune targets without overthinking. These moves deliver steady EPC gains while keeping your home welcoming and efficient.
Choosing Efficient Boilers and Heat Sources
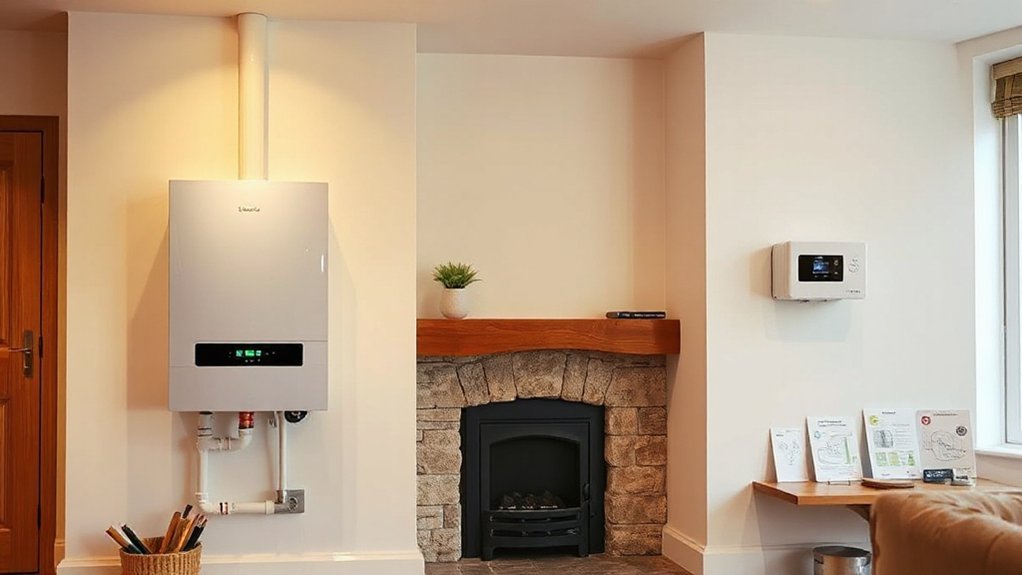
When you choose efficient boilers and heat sources, start by comparing Efficient Boiler Options to find models with high seasonal efficiency and low running costs.
Consider Ideal Heat Sources that fit your home’s needs, whether gas condensing, heat pumps, or hybrid systems, and weigh upfront costs against long-term savings.
Finally, do a System Compatibility Check to ensure your existing radiators, controls, and wiring will work with the new setup and maximize performance.
Efficient Boiler Options
Choosing an efficient boiler or heat source starts with matching the right technology to your home and fuel, then sizing it correctly for comfort and energy savings. You’ll prioritise options that fit your current system and future needs, avoiding oversized units that spike costs.
Condensing boilers offer high efficiency, while heat pumps provide versatile heating and cooling in milder UK climates. Consider combi, system, or regular setups based on occupancy and hot-water demand.
For gas, be mindful of local fuel costs and maintenance access; for low-carbon goals, pair with solar or ambient energy strategies where feasible.
Confirm HVAC maintenance is built into your plan, and track boiler lifespan estimates to time upgrades. Clear comparisons help you feel confident in a practical, affordable upgrade.
Optimal Heat Sources
Ideal heat sources pair with your boiler choice to deliver steady comfort and lower running costs. You’re looking for reliability and efficiency, so prioritize systems that suit your home’s fabric and occupancy.
For many older UK properties, a modern condensing boiler combined with a renewable-friendly heat source delivers the best EPC boost. Consider solar panels to preheat domestic hot water and reduce gas demand during sunny days.
Plus, a low-temperature radiant or underfloor system can help maximize efficiency. Rainwater harvesting isn’t a boiler feature, but it supports lower energy use by reducing hot water needs in garden and external tasks when linked to efficient taps and controls.
Choose heat sources that integrate with smart controls, enabling you to tailor performance to seasons, occupancy, and comfort without waste.
System Compatibility Check
Is your system truly compatible? Before you decide on a boiler or heat source, run a quick compatibility check. Confirm that your existing plumbing, radiators, and controls can handle a newer unit without overhauling the whole system.
Look for matching service clearances, venting needs, and electrical load requirements. Check compatibility with smart thermostats and zoning if you want future-ready control.
Assess whether your current boiler size aligns with your home’s heat demand, avoiding short cycling or oversizing.
Review manufacturer cross-compatibility notes and warranty terms to protect upgrade potential.
If components are mismatched, you may need intermediary upgrades, like an efficient pump, buffer vessel, or improved piping.
A clear compatibility assessment preserves energy gains, keeps costs predictable, and supports confident EPC improvements.
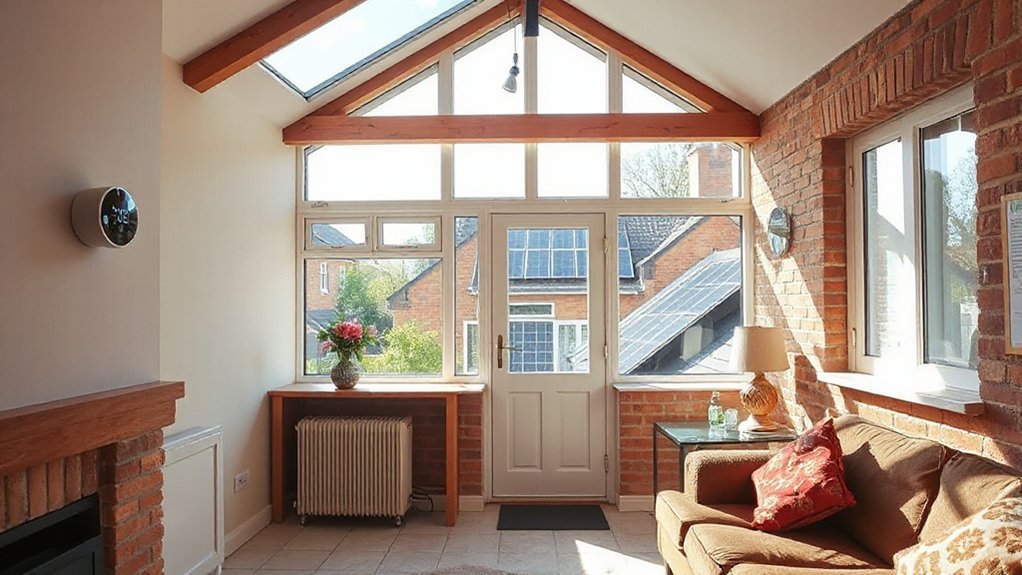
Windows and Draught-Proofing for Real Gains
If you’re chasing real gains on EPC ratings, start with your windows and draught-proofing: they’re the low-cost, high-impact upgrades that cut heat loss at the source. You’ll achieve steady improvements by prioritising practical window enhancements that reduce drafts without sacrificing comfort.
Begin with airtight seals around frames and sashes, then add weatherstripping to prioritise energy efficiency. Consider draft-proofing techniques like low-resistance seals and insulated curtains for seasonal buffering.
Choose double or triple glazing where feasible, but tailor upgrades to your home’s fabric and budget. Regularly service vents and ensure dummy trickle vents stay functional.
These steps foster a sense of belonging, reassuring you that responsive, actionable changes deliver noticeable comfort and measurable EPC gains.
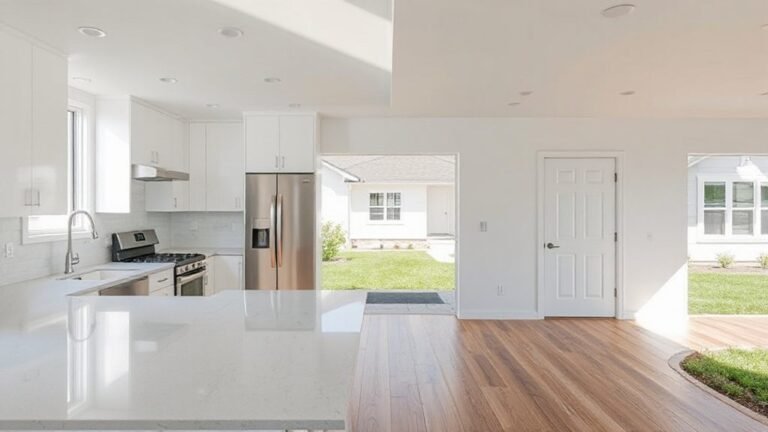
Roof and Floor Insulation Upgrades That Pack a Punch
Roof and floor insulation upgrades offer a practical, high-impact path after tightening drafts. You’ll boost comfort and cut heating waste without major disruption.
Roof insulation reduces heat loss where it matters most, while floor insulation stops cold from creeping up from uninsulated spaces below. To maximize EPC gains, target gaps around joists and edge vents, then choose high-performance materials suited to your property type.
You’ll notice steadier indoor temperatures, lower energy bills, and fewer cold spots in living rooms and bedrooms.
For floor insulation, consider solid or suspended options depending on access and floor structure, prioritising airtight seals at the edges.
Roof insulation and Floor insulation work in tandem, delivering consistent warmth and improved rating without extensive remodeling.
Renewable Options and Grants: What You Can Access
Renewable options and grants can substantially cut upfront costs and shorten payback periods, so start by identifying which programs apply to your property and location. You’ll find options that fit older UK homes, from solar panels to broader energy efficiency incentives.
Evaluate eligibility for grants, subsidies, and installer-supported schemes, and map them to your EPC goals. Prioritise practical steps: select proven equipment, seek approved installers, and confirm transferability of any grants if you move.
Keep in mind that some incentives require minimum energy performance or roof suitability, so address basics first. Solar panels often deliver the clearest financial path, while renewable grants can offset capex and accelerate payback.
Stay organized, compare offers, and document compliance to maximise your upgrade outcomes and sense of secure belonging.
Planning, Budgeting, and Measuring Your Savings
Planning, budgeting, and measuring your savings starts with a clear baseline: know your current energy use, costs, and EPC target, then map concrete year-by-year steps.
You’ll conduct an energy audit to identify quick wins and longer-term gains, aligning actions with your home’s habits and occupancy.
Establish budgeting strategies that reflect realistic cash flow: group substantial upgrades into phased steps, reserve a small emergency fund, and track monthly spending against targets.
Set measurable milestones, such as reductions in kWh or pounds saved, and review quarterly to stay on course.
Communicate progress with your household to sustain motivation and shared ownership.
Use simple dashboards or apps to visualize gains, celebrate small wins, and keep momentum toward a stronger EPC rating.
Estimating Long-Term Costs: When Will Upgrades Pay Off
Estimating long-term costs helps you time upgrades for maximum payoff. You’ll weigh upfront spend against future savings, maintenance needs, and potential property value gains.
Begin with a realistic horizon—5, 10, or 15 years—so you can compare scenarios on equal footing.
Factor in long term maintenance for each upgrade, including expected wear, parts, and service intervals.
Don’t overlook non-financial benefits that matter to you, like comfort and reliability, which affect how you feel about your home.
Use upgrade timing to align with planned renovations, funding cycles, or energy price trends.
Build a simple model: initial cost, annual savings, and residual value.
Reassess periodically as prices, regs, and tech evolve to guarantee your plan stays relevant and affordable.
Frequently Asked Questions
How Do EPC Upgrades Affect Listed Buildings or Conservation Areas?
EPC upgrades must respect Listed building regulations and Conservation area restrictions, so you’ll plan carefully, seek approvals, and choose compliant improvements that don’t compromise character while boosting efficiency. You’ll stay informed, collaborative, confident, and compliant throughout.
Are EPC Improvements Worth It in Leasehold Properties?
Because leasehold considerations matter, yes—EP C improvements can be worthwhile if upgrade costs align with longer tenancy and increased value. You’ll weigh upfront costs against energy savings, maintenance, and predictable bills, building belonging through smarter, shared investments.
What Sindical Impact Do Upgrades Have on Resale Value?
Renovation costs can affect resale value, but you’ll benefit from stronger market perception as upgrades improve energy efficiency. You’ll attract buyers who value modern comfort, while confident budgeting protects you from sticker shock and fosters belonging.
Do EPC Gains Vary by Property Age or Construction Type?
Yes, EPC gains vary by property age and construction type. You’ll see bigger improvements with solid-wall insulation and modern heating systems, plus tailored insulation strategies for older builds to feel more efficient and part of a planned upgrade.
How Quickly Do Improvements Affect Energy Bills After Install?
“Hit the ground running,” you’ll see bill changes within days to weeks after installs. Energy saving myths fade as you implement cost effective upgrades, quickly cutting waste and aligning with a practical, belonging-minded approach to measured gains.
Conclusion
In short, focus on insulation first, then seal airtightness, add efficient heating, and upgrade windows as your next gains. Don’t overlook roof, floor, and controlled ventilation to keep moisture in check. Yes, grants help, but prioritize cost-effective tweaks that cut heat loss now. If you doubt the payoff, remember most homes see quicker bills and comfort improvements than you expect after solid airtight insulation and a smart, efficient boiler or heat pump.