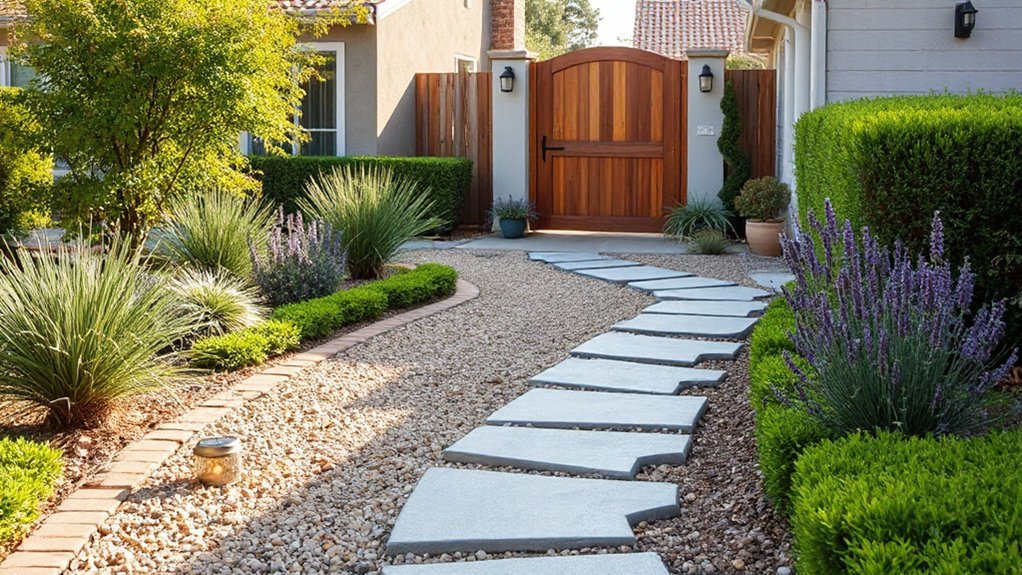
A well-planned garden pathway elevates curb appeal through deliberate form, material choice, and drainage logic. You’ll evaluate style—curved versus straight—and select durable materials like concrete pavers, gravel, or stepping stones, ensuring slip resistance and proper slope. Borders in brick or natural stone create contrast and structure, while focal points such as seating or art anchor the route. Start with a concise program, then implement in measured steps; the result should balance function, maintenance, and seasonal texture.
Pick the Right Garden Pathway Style

Choosing the right garden pathway style sets the overall flow of your landscape and guides user expectation. You assess site conditions, circulation, and sightlines to determine how a path complements surrounding features.
Prioritize durable materials and slip resistance, matching scale to nearby structures and planting zones. In garden design terms, select a path form—straight, curved, or serpentine—that reinforces intention and guides movement without forcing detours.
Consider substrate, edging, and jointing details that resist weed intrusion while allowing drainage. For plant selection, guarantee adjacent flora accentuates the path rather than crowding it, maintaining clear visibility and accessibility.
Align color, texture, and finish with architectural style, establishing cohesion across substrate, edging, and focal landscape elements. This groundwork enables coherent, maintenance-friendly navigation.
Plan Your Budget and Materials
Plan your budget and materials by itemizing project components, estimating unit costs, and confirming available shipments before breaking ground. You’ll define scope with a precise bill of materials, including edging, base aggregate, path surface, and sleeper or stepping-stone modules.
Establish a controlled budget by sourcing midrange materials that meet durability and aesthetics goals, then add contingency for weather or delivery delays.
Map quantities to the garden layout and planting zones, ensuring compatibility with site drainage and microclimates.
Verify supplier lead times, delivery windows, and return policies to minimize downtime.
Align installation sequence with critical site access and soil conditions, documenting assumed dimensions and tolerances.
Conclude with a procurement checklist, emphasizing modular components for future upgrades and maintenance efficiency.
Step-by-Step: Lay a Simple Gravel Path
Begin by outlining a shallow, well-drained trench that conforms to your intended path width and slope. Then compact a firm subgrade to prevent settling. You’ll lay a uniform, clean edge to define the corridor and minimize gravel migration.
Select angular, crushed gravel in 3/4-inch to 1 1/2-inch sizes for stability and drainage efficiency. Screed a compacted base layer of larger aggregates, then rake to create a consistent profile with slight crown for runoff.
Install a weed-suppressing fabric if desired, followed by a 2–3 inch gravel surface. Edge restraints keep material in place and maintain line, while a simple footpath cross-section supports easy foot traffic.
This approach enhances garden design and outdoor aesthetics, delivering a durable, low-maintenance feature with precise, repeatable results. Verify drainage and compact again after initial use.
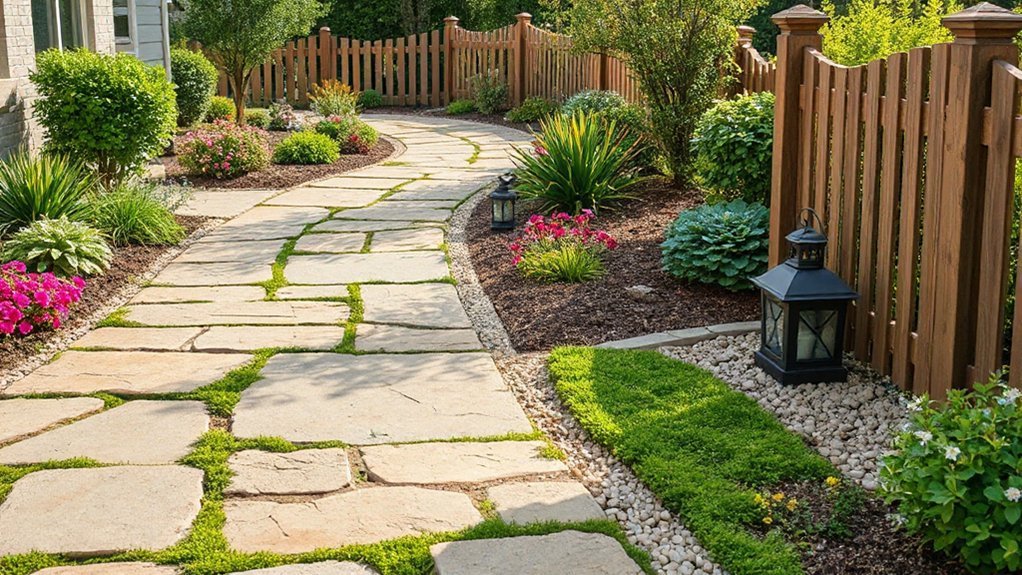
Create Stepping-Stone Mosaics for Charm
Stepping-stone mosaics add tactile rhythm and focal points to a path, turning a simple route into a curated sequence of visual pauses. You execute this by selecting stone fragments with consistent color temperature and textural contrast, then arrange them on a compacted gravel or soil base to guarantee uniform drainage.
Precision alignment matters: set stones level, with joints not exceeding 1.5 cm, to prevent wobble and trips. Use radial or grid patterns to control pacing, alternating oversized pieces with smaller shards to create deliberate intervals.
Mortar-free bedding allows seasonal movement; sealants aren’t necessary but can deter weed intrusion between stones. Integrate garden decor elements at key nodes—low seating, planters, or sculptural accents—to amplify the mosaic’s role as a training ground for eye movement and a durable, low-maintenance feature.
Use Brick and Paver Borders to Boost Curb Appeal
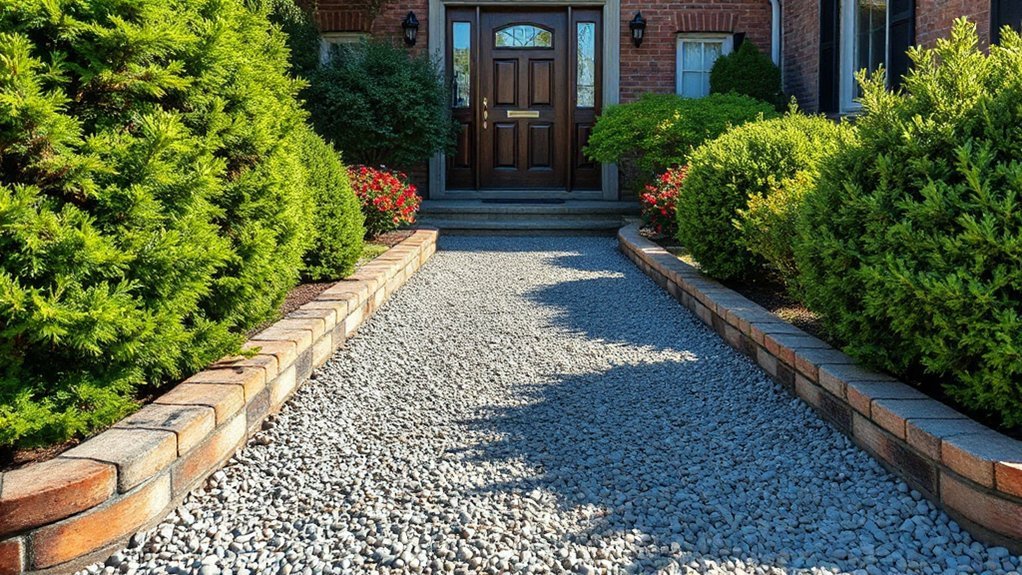
Using brick and paver borders defines edge quality and adds structure to your path, directly contributing to curb appeal. These durable accents frame shifts, emphasize linework, and reinforce the path’s sense of permanence.
Plan with consistent joint spacing and material contrast to optimize curb appeal while ensuring longevity.
Brick And Paver Borders
Brick and paver borders define the edges of your garden path with crisp lines and durable contrast, guiding foot traffic while enhancing curb appeal. You design borders to establish a clear edge, selecting bricks or pavers that complement surrounding materials and lawn. Use consistent joint widths and patterning to minimize maintenance and maximize durability.
Consider color and texture to align with overall garden design, avoiding clashing tones that disrupt the route’s visual rhythm. Install a compacted base, appropriate edge restraints, and a suitable mortar or dry-fit system to prevent movement over time.
Plan border width to accommodate future plant growth near paths without encroachment. For plant selection, keep borders free from high-rooting specimens; prioritize low-profile or decorative foliage nearby. This approach maintains clean lines and functional circulation.
Curb Appeal Enhancement
When you frame a path with brick and paver borders, you create an immediate design anchor that sharpens curb appeal while guiding foot traffic. This technique reinforces garden design principles by establishing a crisp edge that merges between hardscape and planting beds.
Maintain consistent joint widths and a restrained color palette to prevent visual clutter, ensuring the border reads as a cohesive border element rather than a competing feature.
In landscape architecture terms, bricks and pavers act as a tactile threshold, signaling entry points and directing movement with precision. Choose modular patterns that echo the surrounding architectural language, whether traditional or contemporary.
Prioritize durability and raised edging to protect mulch, grass, and plantings, while enhancing perceived value through disciplined alignment and texture contrast.
Durable Path Accents
Durable path accents rely on brick and paver borders to reinforce curb appeal while guiding movement. You select materials with measured density, slip resistance, and durability, ensuring long-term behavior under foot traffic.
Brick borders deliver warm, uniform profiles; paver borders provide modular flexibility for tight radii and asymmetrical layouts. Align borders with sightlines from entry points to accent focal plants, preserving lawn clearance and drainage flow.
Install a consistent bed edge to prevent soil creep and maintain clean lines around garden edging. Use contrasting color and texture to delineate pathway from surrounding mulch, enhancing decorative accents without visual clutter.
Integrate garden edging as a defined boundary, then anchor borders with compacted base and edge restraints. Precision detailing yields durable, low-maintenance pathways.
Add Solar Lighting and Low-Maintenance Plantings
Installing solar lighting along the garden path provides consistent illumination with minimal maintenance.
Choosing low-profile fixtures guarantees the lighting remains unobtrusive. You’ll pair fixtures with a narrow photometric spread to emphasize edges and reduce glare, ensuring safe navigation after dusk.
Position solar markers at intervals that align with plantings, creating a rhythm without crowding attention.
Select low maintenance plantings—drought-tolerant perennials and evergreen groundcovers—that require minimal pruning and avoid root encroachment on the path.
Use color contrast to enhance visibility: light-edged borders, pale mulch, and dark paving.
Integrate smart timing to peak during high-traffic windows, yet conserve energy.
Verify drainage remains unimpeded; maintain routine cleaning of sensor housings and solar panels for sustained performance.
Choose Durable, Low-Maintenance Path Materials
With the previous lighting plan in mind, select materials that withstand foot traffic and weather while minimizing upkeep. Choose durable, low-maintenance path materials that align with your design goals and site conditions. Prioritize slip resistance, dimensional stability, and surface permeability to manage drainage.
Concrete pavers, precast terrazzo, treated timber, and stabilized gravel offer predictable performance when properly installed. For each option, specify base preparation, edging, and joint details to curb weed growth and movement. Consider color and texture that complement adjacent hardscape and plantings without requiring frequent sealing.
Integrate Garden art at focal nodes with minimal maintenance or interference. Guarantee plant selection supports the path’s microclimate and visual rhythm without encroaching on circulation.
This approach sustains longevity while preserving a clean, purposeful aesthetic.
Maintain Paths for Year-Round Appeal
You’ll balance seasonal texture and contrast with durable, year-round materials to maintain a cohesive look.
By selecting components that withstand temperature shifts and foot traffic, you’ll guarantee consistent form and rigour in your pathway design.
This discussion starts with precise material choices and patterning that adapt from frost to heat while preserving visual clarity.
Seasonal Texture and Contrast
Seasonal texture and contrast are essential for year-round pathway appeal, so select materials that differ in surface feel, color, and grain while maintaining a cohesive palette. You should prioritize tactile variety that remains legible under varied light and weather, ensuring each segment reads as a deliberate design step.
Start with a base of durable, uniform pavers, then layer alternative textures to create visual cadence without disrupting flow. Integrate seasonal foliage as a soft, seasonal accent rather than a dominant element, aligning plant material with path tones to reinforce contrast.
Prioritize texture contrast between materials—e.g., smooth edged stone beside coarse gravel—while controlling joint gaps for clean silhouettes. Maintain consistent grout or bedding to preserve linear precision and minimize maintenance surprises across seasons.
Durable Materials for Year-Round
Durable materials guarantee year-round pathway usability by balancing performance with aesthetics. You select substrates that resist freeze–thaw cycles, thermal expansion, and moisture ingress, while preserving slip resistance and visual clarity.
Consider stabilized aggregates, reinforced concrete slabs, and paver systems with interlocking joints to minimize movement and rutting. You’ll prioritize drainage efficiency, sub-base compaction, and edge confinement to prevent washout and heaving.
Surface textures should deliver consistent grip across seasons without creating trip hazards. You evaluate environmental impact through low-emit materials, recycled content, and long service life, reducing maintenance cycles.
Garden safety remains paramount, with clearly defined edges and visible contrast for all users. Your design integrates durable materials that support accessibility and aesthetic cohesion, ensuring year-round curb appeal with minimized upkeep.
Quick Finishing Touches to Tie It Together
To finish a garden path with precision, apply small, deliberate details that unify materials, scale, and planting. You tighten the final cue by selecting anchor elements that repeat the linework of the pathway, ensuring consistent grout, edging, and joint gaps.
Introduce garden furniture as a calibrated pause structure near seating alcoves, matching metal or wood tones to the pathway palette for cohesion. Place outdoor art with proportional restraint, choosing pieces that reflect the path’s rhythm rather than overpower it.
Use lighting as a finishing layer—low, focused accents that highlight texture without glare. Balance texture contrasts by reserving high-relief features for focal nodes, and avoid clutter by assigning a single feature per sightline.
Confirm sightlines, sighting angles, and maintenance accessibility before presenting the completed route.
Frequently Asked Questions
How Do I Choose a Path Width for My Yard?
You should start with pathway width considerations aligned to your yard size planning, aiming for 36–42 inches for most residential paths. In tight yards, 30 inches works; in larger setups, 48 inches enhances accessibility and flow.
What Maintenance Should I Expect Long-Term?
Maintenance is manageable; expect periodic weeding and edging, plus seasonal refreshes. You’ll monitor soil, weed growth, and erosion, adjust mulch options as needed. In a garden bed, plan edging tightly; mulch options help steady long-term paths.
Can DIY Paths Handle Heavy Foot Traffic?
Yes, you can, but choose sturdy path material options and guarantee proper subgrade. You’ll maximize durability under heavy foot traffic. Compare cost, installation complexity, and maintenance; perform a cost comparison to select the best-performing, long-lasting option for your design.
How Do I Prevent Weed Growth Under Paths?
You prevent weed growth under paths by installing weed barriers, then applying durable mulch alternatives, such as crushed gravel or geotextile fabric, topped with compacted stone; guarantee proper slope and edging to maintain barrier effectiveness and drainage.
What Permits or Codes Apply to Garden Paths?
You’ll need permit requirements and local regulations verified with your city or county planning department before installing garden paths. Discuss setbacks, surface materials, and drainage; make sure code-compliant access. It’s a tall order, but you’ll nail it, no surprises.
Conclusion
You’ll find that a simple gravel path hides complexity, while a paved ribbon reveals restraint. Juxtapose rugged texture with refined borders—bricks framing stepping stones, grit softening with low-maintenance plants. You’ll measure drainage and slip resistance with clinical precision, yet feel the garden breathe as solar lights glow softly. Your plan blends lasting materials with seasonal restraint, forming curb appeal that’s both durable and inviting. The result: a coherent system that looks effortless, even when you’ve engineered every last angle.