Does the theory that “renovations always go smoother with upfront checks” hold up under scrutiny? You’ll want a methodical, precise approach: test structural readiness, verify permits and licenses, assess electrical, plumbing, and HVAC health, and map out hidden risks. You’ll establish contingency buffers and document everything before you close. If any red flags emerge, you’ll know where to adjust scope or budget. Keep going to build a solid, informed plan that minimizes surprises.
Plan Before You Renovate: Key Checks That Save Time and Money

Before you start, map out your renovation goals and constraints to avoid scope creep and costly changes later. You’ll assess each area with a methodical checklist, prioritizing critical risks over vanity upgrades. Begin by comparing Design trends against your space’s structure and budget to avoid chasing fads that don’t fit. Next, evaluate material selection for durability, maintenance, and compatibility with existing systems. Verify vendor timelines, warranty terms, and return policies to prevent delays from supplier issues. Check local codes and permitting requirements early, ensuring your plan passes review without costly redesigns. Estimate total costs, including contingencies, and set a realistic schedule with milestones. Document decisions in writing, then revisit priorities if new constraints appear, keeping the plan lean, precise, and actionable.
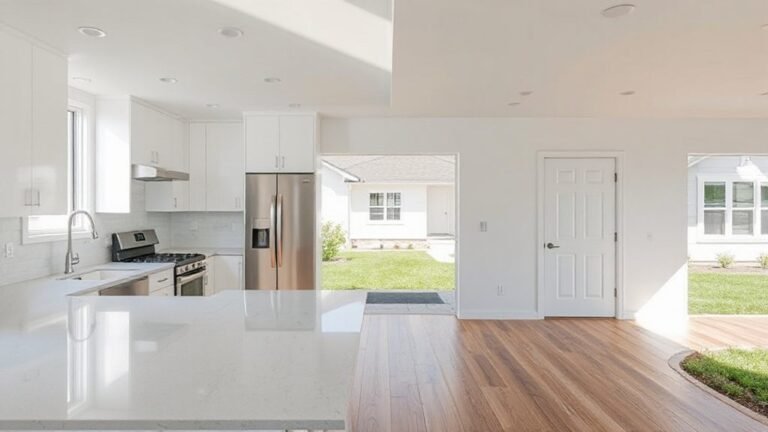
Define Your Renovation Scope and Goals
Defining your renovation scope and goals starts with a precise brief: articulate exactly what you want to achieve, why it matters, and how success will be measured. You identify core needs, constraints, and outcomes, then translate them into a focused scope that guides decisions. This clarity prevents scope creep and aligns budget with expectations. Assess Design inspiration to anchor taste and function, distinguishing must-haves from nice-to-haves. Document measurable targets for layout efficiency, lighting quality, and material durability. Before selecting contractors, confirm compatibility between envisioned outcomes and feasibility within your site’s realities. Establish decision criteria for tradeoffs and timeline milestones, so each choice serves the stated goals. Consider Material selection early to balance aesthetics, cost, and long-term maintenance. Revisit the brief as plans evolve to stay sharp and purposeful.
Assess Structural Readiness: What to Inspect in the Frame
Evaluating structural readiness means inspecting the frame to verify it can support the planned renovation. You’ll assess foundational stability by checking for shifts, cracks, or uneven settling at slabs, footings, and load-bearing walls. Look for telltale signs: sagging beams, misaligned studs, or unusual nail patterns that hint at movement. Inspect wall integrity, noting bowing, cracking, or hollow sections that compromise framing. Tap surfaces to distinguish solid from compromised members; listen for hollow sounds indicating voids or rot. Verify connections: bolts, joists, and ledger attachments should be tight and square. Check for rust on metal components and corrosion at fasteners. Document elevations, take photos, and compare with original plans. If abnormalities appear, consult a structural professional before proceeding with any renovation changes.
Evaluate Electrical Health Before You Buy or Break Ground
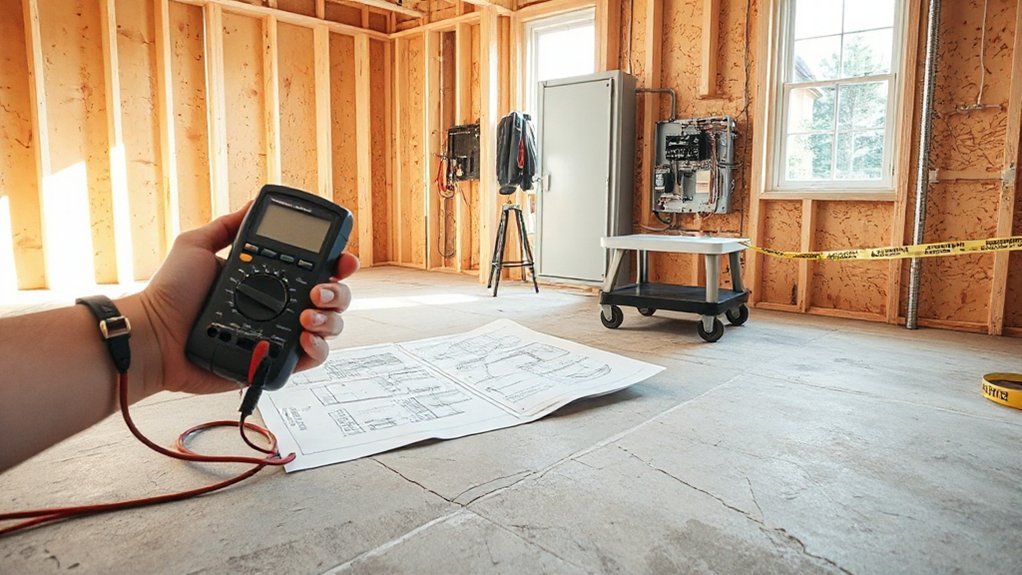
Electrical health matters most when you’re budgeting risk as much as budget. Before you buy or break ground, assess the existing electrical system with discipline. Begin with a documented wiring inspection to identify age, conductor quality, and overloading signs. Look for hidden hazards like aluminum wiring, DIY fixes, and mismatched breakers that could start a fire. Verify panel capacity matches planned loads and note any nonconforming outlets or grounded stalls. Check for updated grounding, GFCI/AFCI protection in required areas, and proper conduit use in damp zones. Review permit history and any previous renovations for coded compliance. Record deviations and prioritize items by risk, cost, and disruption. Electrical safety isn’t cosmetic; address critical flaws now to avoid costly retrofits later.
Inspect Plumbing, HVAC, and Hidden Ductwork: Red Flags to Watch
Inspecting plumbing, HVAC, and hidden ductwork requires a careful, systematic approach because unseen issues often drive the overall renovation cost. You’ll assess visible fixtures for leaks, corrosion, water stains, and pressure irregularities, cataloging patterns over time. Inspect accessible plumbing for age, material degradation, loose fittings, and improper replacements, noting evidence of prior repairs. For the HVAC, verify airflow balance, thermostat responses, and condensate management, and request maintenance records or last service dates. Pay particular attention to ductwork inspection: look for crushed, disconnected, or rusted sections, insulation gaps, or mold indicators. Run a smoke test or pressure check where feasible to reveal hidden leaks. Document all findings with dates, photos, and vendor notes, using this data to forecast repair or replacement costs accurately.
Permits, Compliance, and Paper Trail: Demands to Protect Your Investment
You’ll want to confirm that all permits are in place and up to date before you commit. A clear paper trail shows compliance history, project scope, and any deviations, so you can evaluate risk and future costs with precision. Start by outlining what permits exist, what approvals are required, and how documentation will be organized for easy verification.
Permits Essentials
Permits aren’t optional ballast; they’re a built-in safeguard for your investment. When you assess a renovation, you’ll verify that permits are in place and current, and you’ll anticipate what else is required. In this light, focus on the essentials:
- Permit application and status checks to confirm approvals are active and aligned with project scope.
- Zoning regulations verification to ensure the planned work complies with setback, height, and use limitations.
- Documentation review to confirm listed trades, code references, and inspection milestones match the actual build.
A disciplined review minimizes rework, penalties, and hidden costs. It’s not about paperwork for its own sake; it’s about ensuring the project can be completed legally, safely, and without unexpected setbacks at a later stage.
Paper Trail Safeguards
To safeguard your investment, you’ll build a clear paper trail that documents every permit, compliance check, and milestone. Paper Trail Safeguards means you systematically verify filings, licenses, and approvals before closing the deal, then track any changes throughout construction. Begin with legal considerations: confirm project scope aligns with zoning, permits, and parcel records, and note expiration dates to avoid gaps. Next, compile a ledger of inspections, deviations, and final sign-offs, attaching official responses to each item. Insurance requirements should be reviewed—verify coverage for the renovation’s phases, subcontractors, and liability limits, updating policies as necessary. Maintain digital copies with timestamps, and organize a cross-referenced index for quick audits. This disciplined approach protects value, reduces surprises, and supports defensible decisions if disputes arise.
Budget Buffers and Contingency: How Much Do You Really Need?
You’ll set expectations with a contingency percentage that fits the project scope, then test that figure against common budgeting realities. Consider the Contingency Percentage Guide to align risk tolerance with project complexity, while buffering for unknowns and price shifts. We’ll assess practical realities—material costs, labor volatility, and permit delays—to refine how much you actually need.
Contingency Percentage Guide
Contingency buffers are essential for keeping a renovation on track when surprises arise, and determining the right percentage starts with a clear risk assessment. You’ll establish a defensible figure by evaluating scope detail, contractor reliability, and site conditions, then translate that into a concrete contingency tier.
1) Assess inherent risk: size of project, complexity, and procurement lead times.
2) Align with budget allocation: designate a dedicated contingency line item separate from owner’s costs.
3) Revisit periodically: adjust for changes in scope, market prices, or new constraints.
This approach supports contingency planning by anchoring decisions in evidence, not optimism. Keep buffers proportional to risk, and document decisions for transparency. Risk-informed budgeting prevents overruns, enabling disciplined budget allocation and steady project progress.
Buffering Budget Realities
With a clear plan in place, you’ll translate risk into reality by sizing budget buffers to match expected volatility and procurement realities. In budgeting for a renovation, you must quantify buffers as deliberate tools, not afterthoughts. Begin by mapping likely cost drivers—materials, labor, permits, and schedule shifts—and assign probability-weighted impact estimates. Then set contingency ranges that reflect your budget constraints and procurement timeline, tailoring buffers to each line item. This isn’t guesswork; it’s disciplined financial planning that guards you against scope creep and supplier delays. Regularly revisit assumptions as bids firm up and market conditions shift. Document the rationale for every allowance, so you can defend decisions and adjust when realities diverge. The result is a resilient, transparent project path you control.
Contractor Credibility: Verifying References and Licenses
Before you hire, verify the contractor’s credibility by checking references and licenses methodically. A careful credibility check supports the project’s success and shields you from disputes. Focus on documented proof, not promises, and record findings for comparison.
1) Verify contractor reputation: contact at least three former clients, ask specific questions about timeline, workmanship, and communication, and note any recurring issues.
2) Conduct licensing verification: confirm active status, classifications, expirations, and any disciplinary history with the relevant licensing board.
3) Cross-check documentation: request insurance certificates, bond information, and project permits, then confirm consistency with stated scope and local codes.
Clarify Scope and Expectations: Aligning Goals With Reality

Set clear goals upfront by detailing what you want the project to achieve, then align those goals with your budget, timeline, and site constraints. You’ll methodically translate ambitions into measurable deliverables, ensuring every requirement is explicit and testable. Define scope boundaries early to prevent drift, listing core objectives and nonnegotiables, then map them to feasible methods and materials. Prioritize design alignment so decisions reflect both aesthetic intent and functional needs, avoiding scope creep through concrete change controls. Communicate with stakeholders to confirm shared understanding, roles, and decision rights, documenting responses and assumptions. Evaluate risks, trade-offs, and contingencies before approvals. Maintain precise, concise records that support accountability. This disciplined approach strengthens stakeholder communication and keeps expectations aligned with reality, reducing surprises during procurement and construction phases.
Inspection Timeline and Documentation Pack: What to Check Before Closing
You’ll map the Inspection Timeline Milestones against your closing date to guarantee no gaps in due diligence. Review the Documentation Pack Checklist early and track item readiness to confirm permit files, warranties, and contractor agreements are complete. Use Closing-Readiness Validation to verify all documents align with expectations and the project scope before you sign.
Inspection Timeline Milestones
Once the inspection window opens, map out the milestone sequence: interim checks, lender- and insurer-required documents, and the final walk-through. You’ll track progress against a tight timeline, ensuring each step builds a solid evidence base for closing. Focus on concrete deliverables, not impressions, and verify compatibility with your design aims, especially around design trends and material selection.
- Interim checks: confirm structural integrity, safety systems, and code compliance with documented photos and notes.
- Documentation milestones: collect financing- and insurer-specific paperwork, including appraisals, permits, and warranties.
- Final walk-through: validate completed work, confirm finishes align with expectations, and secure final approval for closing.
This sequence keeps you precise, evaluative, and aligned with project design intent.
Documentation Pack Checklist
Documentation packs anchor the closing process. You’ll systematically assemble lender-ready documents, title proofs, and contractor warranties to minimize delays. Begin with the purchase agreement, added riders, and any amendments, then verify the chain of title and lien releases are intact. Collect tax records, insurance policies, and recent appraisal or CMU notes to support value and risk assessment. Include permits, occupancy certificates, and final inspection reports to confirm compliance. Cross-check timelines against the inspection schedule so nothing lapses before closing. Evaluate investment strategies and market trends to contextualize contingencies and pricing cushions, ensuring you’re not overcommitted. Maintain a tidy, indexed pack: duplicates, originals, and secure backups, with a clear contact deck for lenders and vendors. Conclude with a concise closing memo outlining unresolved items.
Closing-Readiness Validation
Closing-readiness hinges on a tightly coordinated inspection timeline and a complete documentation pack. You’ll verify that timing aligns with lender and seller schedules, ensuring critical milestones don’t slip. The documentation pack should be exhaustive, organized, and readily accessible for final reviews, with each item clearly dated and referenced.
- Inspect interior lighting planned for post-close use, confirming fixtures, wiring, and permits meet code, and flag any upgrades required.
- Review landscaping design proposals and site plans, ensuring grading, drainage, and planting choices match maintenance expectations and resale value.
- Compile closing documents, warranties, and contractor affidavits, cross-checking numbers, permits, and compliance notes to prevent last‑minute interruptions.
Frequently Asked Questions
How Long Does a Pre-Purchase Renovation Inspection Typically Take?
A pre-purchase renovation inspection typically takes several hours, usually half a day. You’ll assess structure, services, and safety, noting budget considerations and contractor selection implications, then decide next steps with a clear, methodical plan and documented findings.
What Costs Are Excluded From a Preliminary Site Assessment?
Costs not included in a preliminary site assessment typically cover full structural or environmental investigations, interior inspections, and permit-related fees. You should factor budget considerations for these, plus permit requirements, and plan contingencies for unforeseen items.
Can I Audit Subcontractor Qualifications Upfront or Only With a Contract?
Yes, you can audit subcontractor qualifications upfront, not only with a contract. Subcontractor licensing and qualification verification should be checked early, methodically, to guarantee reliability and compliance before you commit to any agreement.
How Often Should Progress Milestones Be Re-Evaluated During Reno?
You should re-evaluate progress milestones every 2–4 weeks, depending on scope, risk, and funding. Maintain disciplined contractor communication and adjust budgets accordingly, updating estimates promptly. This methodical cadence supports accurate budget planning and ongoing project alignment.
What Safety Standards Apply to Hidden Structural Inspections?
You guarantee safety by following Building codes for hidden structural inspections, targeting structural integrity throughout concealed elements. You assess methods, document findings, and verify compliance, applying disciplined checks to confirm adherence to standards and protect occupants.
Conclusion
Before you pull the trigger, run the numbers, inspect the bones, and verify every line on the permit. You’ll know you’re ready when you have a clear scope, a solid contingency, and a credible crew behind you. Do your due diligence, document every finding, and don’t skip disclosures. Remember: measure twice, cut once. With a methodical check, you’ll turn a potential headache into a solid, informed investment you can stand behind.