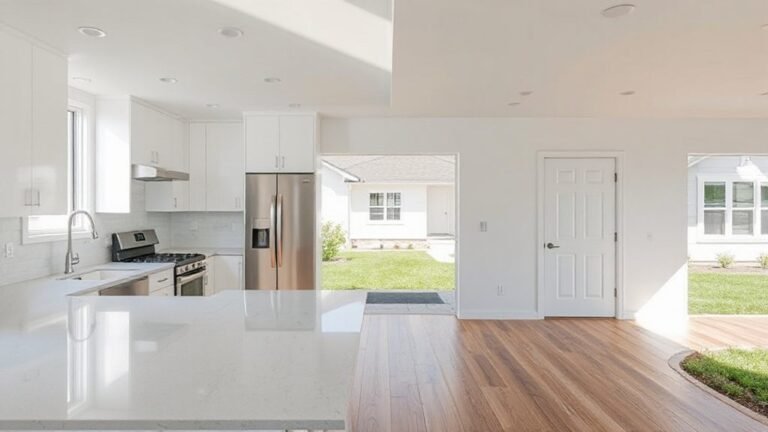
Fixer-uppers tempt with charm, but modern comforts can stay out of reach if you rush in. Before you ink anything, you must build a clear plan: assess structure, damp, and services; set a realistic budget with a contingency; and lock down trustworthy trades with solid bids. You’ll need a practical timeline, permits, and meticulous records to avoid costly detours. Ready to map out your inspection, bids, and milestones before you pick up the tools?
Estimate UK Renovation Costs: What Your Fixer-Upper Will Actually Need

When you’re estimating UK renovation costs, start with a clear, actionable baseline: what your fixer-upper will actually need to bring it to a livable, compliant standard. You’ll map essential systems first—plumbing, electrics, heating, insulation—and list compliant finishes, fixtures, and finishes. Break costs into hard and soft categories: structural work, damp or mold remediation, access improvements, and planning or survey fees. Gather itemized quotes to anchor your budget, then add a contingency for unforeseen issues. For cost estimation accuracy, document scope precisely and avoid scope creep. When you compare bids, weigh not just price but timeline, warranty, and sub trades reliability. In parallel, refine contractor selection criteria, prioritizing local experience, transparent billing, and demonstrated compliance with UK building regs.
Inspecting a Potential UK Fixer-Upper Before You Buy
You’ll want to confirm structural integrity early on, looking for obvious cracks, sloping floors, or sticking doors that signal hidden framing issues. Pay attention to signs that hidden costs are looming, like outdated wiring, damp, or corroded pipes, so you don’t misjudge renovation scope. Plan your survey timing with a professional upfront to slot in expert input on load-bearing elements, moisture risk, and where discreet improvements will matter most.
Structural Integrity Signs
Spotting structural issues early can save you from costly surprises after you move in. When you assess a potential UK fixer-upper, look for telltale signs of settlement: cracks widening over door and window frames, sticking doors, and uneven floors. Check exterior walls for bowing or long diagonal cracks that run through brickwork or plaster. Interior indicators include damp patches, plaster cracks near ceilings, and masonry gaps around fireplaces. Inspect the basement or crawlspace for damp, efflorescence, or wood rot in joists. Pay attention to visible sagging roofs or sagging rafters, which threaten roof condition and overall stability. Note whether chimney lines tilt or separate from the house. Prioritize foundation stability confirmations and a professional roof assessment before bidding or buying.
Hidden Cost Clues
Hidden costs can lurk in plain sight, so don’t rush to push past red flags. You’ll uncover clues by testing the numbers behind every quote, and by flagging anything that shifts after you’ve walked away. Hidden fees and Unexpected expenses show up as small line items that add up fast, so interrogate each cost with a simple question: what could cause it to change? Stay systematic and skeptical, documenting assumptions in writing.
- Unexplained contingency margins on quotes
- Liquidation or disposal fees for materials
- VAT changes or delayed payment terms
- Permit delays or failed inspections impacting timelines
Professional Survey Timing
Scheduling a professional survey early can save you real money and headaches, so don’t wait until you’ve exchanged contracts to act. In this phase, you assess timing as a risk lever: a survey delayed by weeks can push repair plans out of your budget and force costly hold-ups. You’ll want a clearly defined survey scope that matches your fixer-upper aims—structural integrity, damp, wiring, roofing, and timber treatment. Confirm access, permissions, and any necessary licensed trades for follow-up inspections. Don’t rely on vendor assurances; seek a professional assessment with a written report, indicative costs, and remediation priority. Align survey timing with your financing timetable, exchange date, and renovation planning. Use the findings to renegotiate price or request credits, and map a feasible containment plan for urgent defects.
Set a Renovation Budget and Padding for Surprises
Set a realistic renovation budget upfront and add a healthy contingency for surprises, because costs almost always drift once work begins. You’ll need a funding plan that stays flexible as prices shift and unforeseen issues surface. Budget planning becomes your sanity safeguard, letting you compare quotes without panic and avoid mid-project scrambles. Include a conservative contingency—typically 10–20% of the build—to cover hidden flaws, material price spikes, and labor changes. Track every line-item and adjust with evidence, not vibes. Maintain a clear reserve for essential fixes that crops up after demolition or discovery.
- Calculate a baseline total and earmark surprise padding in a separate line
- Prioritize essential works over aesthetic upgrades to control scope
- Build in phased drawdown and milestone reviews
- Document every change for future reference
Which Surveys to Order and What They Reveal

You’ve set a solid budget and padding; now you need the right information to protect that plan. You’ll prioritise surveys that expose practical risks without bias. Start with a basic property survey to confirm structure and identify obvious defects. Then add a Building Survey if the house seems old or has quirks that may hide costly repairs. Look for damp, timber faults, roof integrity, plumbing, and electrical safety issues. Commission a driven yet scoped Survey types mix to avoid overkill. Always compare findings with the property valuation to spot over- or under-priced angles. Use surveys to quantify repairs, timetable impacts, and safety compliance. Remember, precise reports let you negotiate fixes, reveal hidden costs, and safeguard your renovation budget.
Choose a Renovation Mortgage and Drawdown
Choosing a renovation mortgage and planning drawdowns is about aligning funding to your project’s milestones. You want clarity on when money transfers occur, how interest works, and what fees apply, so you’re not overpaying or delaying progress. Look at mortgage options that expressly cover renovations, not standard remortgages, to avoid pointless restrictions. Compare drawdown schedules, cancellation terms, and inspection-triggered releases. Guarantee you can fund contingency costs without repeating applications. Finally, verify lender timelines align with your build plan, so cash arrives as work progresses.
1) Compare renovation-specific mortgage options and lenders, noting eligibility, rates, and fees.
2) Map drawdown milestones to your construction phases, including contingency buffers.
3) Confirm inspection and valuation requirements, release criteria, and documentation needs.
4) Align repayment terms with project cash flow, accounting for interest on undrawn funds.
Planning Permissions and Building Regs for a Fixer-Upper
Planning permissions and Building Regulations are your guardrails for a fixer-upper. You’ll want to check what your project legally can and can’t do, before you lift a single saw. Start with the basics: do you need planning permission for extensions, changes of use, or external alterations? Many homes require only Building Regulations approval, but some also need planning consent. Your Local planning authorities are the gatekeepers for these decisions, and they’ll differ by council area, so confirm early. Historic preservation considerations can restrict demolition or façade changes, especially on listed buildings or conservation areas. Gather sketches, photos, and a clear rationale for changes to speed conversations with planners. Keep compliance documents organized, and factor potential delays into your budget and timeline.
Create a Realistic Renovation Timeline With Milestones

To construct a realistic renovation timeline with clear milestones, start by mapping the project in phases—design, approvals, trades, and execution—and anchor each phase to hard dates and dependencies.
- Identify critical paths for each phase, noting dependencies and realistic buffers.
- Align Design inspiration and material sourcing milestones with project dates to prevent delays.
- Build a calendar with fixed completion dates and go/no-go checkpoints to validate progress.
- Review weekly against baseline, updating risks and contingency plans as issues emerge.
This disciplined approach keeps you moving purposefully, minimizes scope creep, and ensures approvals and trades align with budget and deadlines. Maintain clear records, adjust schedules promptly, and communicate changes to stakeholders.
What to Ask Tradespeople and How to Compare Bids
Ask for a detailed scope of work so you know exactly what’s included and what isn’t. Compare bids side by side for inclusions, exclusions, and any added costs, not just total price. Verify timelines and guarantees upfront, so you can assess reliability and post-completion support.
Ask for Detailed Scope
When you ask tradespeople for a detailed scope, you’ll set clear expectations and prevent costly misunderstandings later.
- Define renovation priorities upfront, listing non-negotiables and wish-list items so bids reflect real goals.
- Request a line-item breakdown with materials, labour, timelines, and contingencies, not just total sums.
- Ask for site assumptions, access constraints, and any required permits to avoid scope creep.
- Seek post-completion deliverables, warranties, and a clear process for handling changes to the detailed scope.
This approach helps you compare bids on apples-to-apples terms, highlights gaps, and keeps the project anchored to your renovation priorities. Focus on precise, verifiable details and ask for written confirmations of every item.
Compare Bid Inclusions
Now that you’ve defined the scope, you’ll want bids that are apples-to-apples, with every inclusion spelled out. When you compare bids, use a side-by-side sheet listing items like demolition, waste disposal, finishes, and fittings, plus allowances for material costs. Ask tradespeople to quote each line separately and reference supplier equivalents where possible. Look for clarity on inclusions: are scaffolding, permits, site protection, and waste removal included, or billed separately? Note timing and sequencing, but save timelines for later. Use contractor selection criteria beyond price—track communication style, responsiveness, and reliability. Push for a fixed-price approach on core work, with clear exclusions. Don’t forget to verify how changes impact the total, and document any agreed material substitutions.
Verify Timelines and Guarantees
Timelines and guarantees matter as much as price and scope, so nail them down upfront. You’ll want clear milestones and penalties if a deadline slips, plus defined scope changes to avoid scope creep. Verify guarantees and what they cover after completion, including workmanship, materials, and any defects. Ask about project insurance and whether it includes public liability, employer liability, and site protection. Compare bids not just on cost but on the robustness of timelines and warranties offered.
- Confirm start/completion dates with build-in buffers and consequences for delays.
- Clarify what the warranty covers (renovation warranties), duration, and claim process.
- Insist on proof of project insurance and named insureds.
- Require written milestones linked to payments and a change-order protocol.
Common UK Renovation Risks and How to Mitigate Them
Common UK renovation risks can derail a project if you don’t spot them early, so start by evaluating structural issues, damp, and outdated wiring before you commit. You’ll want a transparent risks map: confirm load-bearing walls, inspect for dry rot, and test insulation performance. Damp can mask faster decay, so document damp patches and moisture readings, then price remediation accurately. Electrical systems in older homes often need upgrading to meet current safety standards; plan for rewiring and new consumer units, not just cosmetic fixes. Get independent assessments for unplanned costs, and demand detailed quotes with itemised contingencies. Use renovation insurance to cover tooling, site incidents, and project interruptions. Vet your contractor thoroughly—conduct contractor vetting, check references, licenses, and past project quality to avoid costly delays.
Turn Plans Into a Practical, Actionable Project Plan
Turning your plan into reality starts with a concrete, step-by-step project schedule you’ll actually follow. You’ll translate ideas into a timeline with clear milestones, budgets, and responsible people. Prioritise tasks by impact and risk, then lock in lead times from suppliers and trades. Build in buffers for UK permit checks, delivery delays, and seasonal constraints. Track progress weekly, not daily, to stay focused and adaptable. Set up simple documentation: decisions, costs, and changes, so you can justify next actions at a glance. DIY tips and interior decor ideas stay aligned with scope, preventing scope creep and budget blowouts.
1) Define milestones with dates, owners, and deliverables
2) Create a costed bills-of-materials and contractor schedule
3) Build a risk-adjusted contingency plan
4) Establish a review, update, and sign-off routine
Frequently Asked Questions
How Should I Prioritize Renovations for Resale Value?
Prioritize high-ROI upgrades like kitchen and bathroom updates, improve energy efficiency, and create flexible spaces. You’ll boost resale value through durable finishes, smart storage, and neutral interiors. Focus on interior design that appeals broadly while maximizing efficiency improvements.
What Hidden Costs Often Surprise Buyers After Purchase?
Hidden fees and unexpected expenses often surprise you after purchase, so you’ll want a realistic buffer. You’ll encounter survey gaps, legal costs, VAT, and trades overruns; plan contingencies, document quotes, and review warranties to stay composed.
When Is It Worth Delaying Projects Due to Market Conditions?
When market fluctuations align with your cash flow, you delay projects to avoid lock-in losses; you’ll act only when renovation timing delivers tangible value, balancing risk, cost, and timing with disciplined, practical foresight.
How Do I Verify a Tradesperson’s Licensing and Insurance?
You verify a tradesperson’s licensing by checking Trade certifications with the issuing body, and confirm Insurance coverage details, including policy limits and current endorsements. You ask for certificates, call references, and guarantee coverage remains active throughout the project.
What Contingencies Should I Include for Weather Delays?
Weather delays? Build contingencies into your schedule for weather planning and seasonal impact, including buffer days, flexible start windows, and material lead times. You’ll adjust scopes, renegotiate timelines, and communicate promptly to stay on track and protect budgets.
Conclusion
You’ll love the thrill of a fixer-upper—and the joy of paying for it twice. So, yes, you’ll inspect, budget, survey, draw down, and timeline like a pro, all while pretending the surprises don’t count. Irony aside, you’ll gain a practical edge by staying disciplined: keep notes, vet trades, and document decisions. If you sound skeptical, you’re likely on the right track. Do the work, protect your wallet, and turn that wreck into something solid.