Imagine you’re tracing a neat rectangle in a sunny corner—the kind of project that yields fresh greens the same season you finish it. You’ll choose durable, food-safe materials, decide on a practical size (like 4×8 feet, 12–18 inches deep), and plan for sun and water access. You’ll move from ground prep to frame assembly, then fill with a balanced soil mix and mulch, and finally plant quick, forgiving crops. There’s a simple sequence that keeps you steady as you go.
What a Raised Bed Is and Why It Helps Beginners
A raised bed is a shallow garden frame filled with soil that sits above the ground. You’ll understand why this helps beginners by focusing on control and accessibility.
You get better soil structure, since the contained bed minimizes compaction and enhances drainage. That means you’ll plant with confidence, roots expand, and you’ll notice quicker establishment.
Raised beds reduce soil erosion on windy or rainy days, keeping nutrients in place where plants need them most. You’ll also manage pests more easily, as access is direct and barriers around the frame deter many ground-dwelling pests.
With consistent soil depth, you’ll tailor amendments precisely, improving texture and fertility. In short, it simplifies setup, maintenance, and timely harvesting for new gardeners.
Plan Your Raised Bed: Size, Location, and Goals
Choosing the right size, locating it well, and defining clear goals sets your raised bed up for success. Start by evaluating available space, sunlight, and access for watering and weeding.
A bed around 4×8 feet is manageable for most beginners; if you’re solo, consider 3×6 or 4×6 to reduce overreaching.
Plan depths of 12–18 inches for most crops, and adjust for root veggies if needed.
Position near a water source to simplify irrigation systems and avoid long hoses.
Decide what you’ll grow and align plant spacing with mature sizes to reduce crowding.
Think about garden pest control strategies early, like spacing, timing, and attracting beneficial insects.
Finally, sketch a simple layout, label paths, and mark drip lines or sprinkler zones before building.
Safe, Budget-Friendly Materials for Your Bed
If you’re building a bed on a budget, start with affordable, durable materials that are safe for food growing. Look for untreated or capped lumber, or recycled pallets that haven’t housed chemicals, and use galvanized hardware to resist rust.
For true budget options, repurpose sturdy concrete blocks or heavy-duty landscape timbers, ensuring edges are smooth to avoid injury. Liners aren’t always needed, but a thin, breathable fabric can cut weed pressure and protect stems.
Choose exterior paints and sealants labeled food-safe if you’ll finish surfaces. For ongoing care, prioritize organic pest control methods and compost-rich soil.
Plan a simple drip system for sustainable watering, reducing waste. Keep maintenance low with modular panels you can rearrange as plants grow.
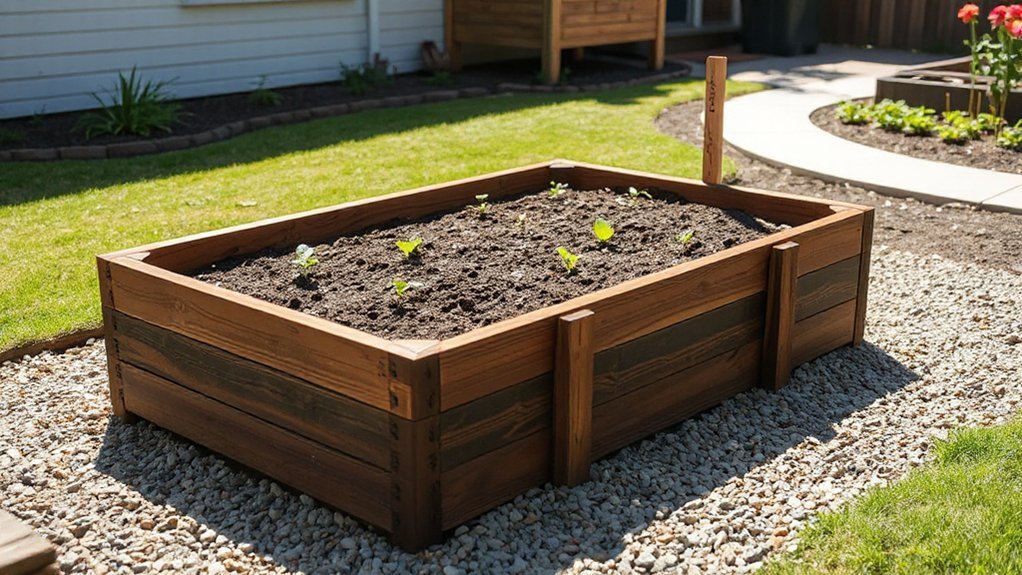
Build an Easy Raised-Bed Frame: Step-By-Step
Choose your lumber wisely, focusing on rot-resistant woods or treated options that won’t leak harmful chemicals.
Plan the frame dimensions to fit your bed space.
Next, pick fasteners and joinery that hold up under moisture.
Think about assembly order to avoid reworking.
Finally, map out simple steps for cutting, assembling, and anchoring the frame so you can follow a steady, repeatable build.
Lumber Selection Basics
Are you unsure which lumber to pick for a sturdy raised-bed frame? Start with treated or naturally durable options. For longevity, choose exterior-grade lumber rated for moisture exposure, like cedar, redwood, or rot-resistant softwoods.
If you go with pine or spruce, plan for protective coating and eventual replacement in high-moisture zones.
Consider the footprint of your bed; thicker boards reduce warping, but heavier materials demand better handling.
Wood treatment matters: select products labeled safe for contact with edible gardens or use untreated wood in contact with soil if you seal all surfaces.
Check for straight boards, minimal knots, and dry, flat stock.
Remember lumber durability impacts maintenance needs and frame stability over time.
Plan for proper sealing, ventilation, and drainage without compromising safety or performance.
Assembly And Fasteners
With your lumber selected and kept in good shape, it’s time to assemble the frame and secure it firmly. Start by laying boards flat, aligning corners at right angles. Use exterior wood screws or bolts for strength, not nails that loosen over time. Pre-drill holes to prevent splitting, then drive fasteners straight and evenly.
Attach side rails to end pieces with metal brackets or corner brackets for extra rigidity. Check square as you go; adjust with clamps if needed. Use landscape fabric under the frame to reduce weed intrusion and improve drainage.
Seal edges with a weatherproof sealant to resist moisture and garden pests. After assembly, position the bed, level it, and practice a consistent watering technique to maintain soil moisture across the bed.
Prepare the Ground for Better Drainage and Leveling
To prepare the ground for better drainage and leveling, start by removing existing vegetation and debris from the site. Then loosen the top 6 to 12 inches of soil. You’ll improve water flow by breaking up compacted patches and allowing air to reach roots.
Rake smooth, eliminating obvious high spots and low depressions, so you create a consistent baseline. Check for drainage paths after light rainfall; redirect runoff if necessary to prevent pooling inside the bed.
Incorporate soil aeration by loosening dense layers with a garden fork or tiller, but avoid over-tilling, which can damage soil structure.
For level accuracy, use a straightedge and a level along the bed’s length, adjusting as needed. Aim for a flat, gradual slope away from structures.
Ground leveling sets the foundation for stable, efficient irrigation.
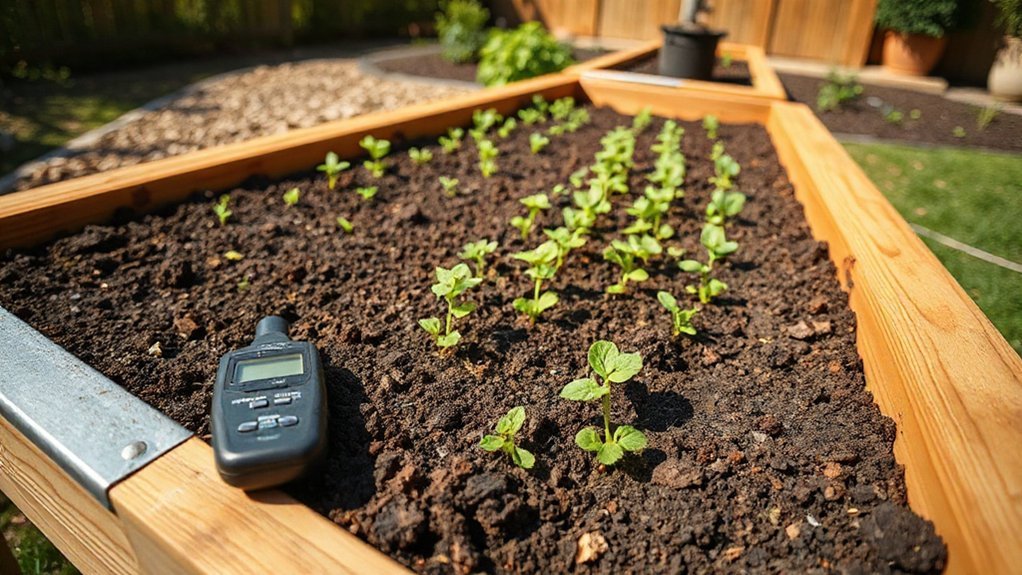
Fill Your Bed: Soil Mix, Compost, and Mulch Tips
For your bed, start with a balanced soil mix—about two parts garden soil to one part compost and one part coarse organic matter or perlite for drainage.
Choose high-quality compost with earthy smell, active texture, and minimal odors or contaminants to boost nutrients without weed seeds.
Then lay a light mulch layer to conserve moisture and suppress weeds, adjusting thickness to match your climate and plant needs.
Soil Mix Ratios
A good soil mix helps your bed drain well, hold moisture, and fuel healthy roots, so start with a strong foundation: a base of topsoil or garden soil, then blend in compost and a light mulch or organic matter.
For raised beds, aim for roughly 60% mineral soil to 30% compost and 10% mulch or finished compost. If you’re growing heavy feeders, tilt toward 70/20/10.
In practice, mix as you fill: layer, turn, test a handful of soil for texture, and adjust. Use finer blends for carrots, chunkier for beans.
Consider companion planting when planning ratios to encourage pest control and diverse root structures.
Keep the bed evenly moist, and avoid compacting the soil during filling.
Compost Quality Tips
Aiming for high-quality compost starts with material choice and the right conditions: keep a diverse mix of greens, browns, and approved amendments, and you’ll build nutrient-rich feed for your bed.
To start, choose kitchen scraps, yard waste, and manure that’s properly composted. Chop chunky materials to speed up decomposition and balance moisture so it doesn’t clump.
Monitor compost odor—if you smell sour or rotten, aerate, add greens or browns, and turn it to restore airflow.
Track compost temperature; aim for steady heat during active phases, then cool as materials finish.
Maintain a moist but not soaking-wet texture.
Turn regularly, but don’t overdo it; you only need gentle aeration to sustain microbial activity.
When mature, screen out large bits for a clean, ready-to-use amendment.
Mulch Application Best
Mulch helps lock in moisture, suppress weeds, and regulate soil temperature, so apply a 2–4 inch layer over your prepared bed after you’ve laid down the soil mix and compost.
In this mulch application, choose the right mulch types for your climate and plant needs—organic options like shredded leaves, straw, or composted wood chips work well for most beds. Avoid excessive fines that compact, and keep a small gap around stems to prevent rot.
Apply evenly, then water lightly to settle the layer. Replenish annually or after heavy rain to maintain coverage.
Monitor for pests and adjust mulch depth if you notice reduced airflow or excess moisture. With proper mulching, you’ll improve moisture retention, soil biology, and long-term bed health.
Planting Guide: What to Grow First and How Much
When you’re starting a raised bed, begin with fast-growing, easy-to-manage crops that you can harvest quickly, like lettuce, spinach, radishes, and green onions. These give you quick feedback and keep soil healthier by keeping it in active use.
After that, fill the bed with a simple plan: plant a shallow-root crop beside deeper-root ones to maximize space, and space plants according to tag recommendations.
For quantity, aim for 6–8 lettuce plants, 6–8 spinach, 6 radishes per square foot cluster, and 3–4 green onions per foot.
Keep succession plantings in mind so you don’t have gaps.
Use composting techniques to feed soil and pest control to protect young crops without heavy sprays.
Harvest regularly to encourage ongoing production.
Maintain, Troubleshoot, and Save Time With Smart Shortcuts
To keep your raised bed productive with minimal fuss, establish a quick routine: check moisture, inspect for pests, and top up nutrients on a predictable schedule. You’ll save time by using smart shortcuts that fit your garden clock.
Set watering schedules that match weather, plant needs, and mulch depth, so you rarely guess. Use a simple notepad or app to track when you watered, fed, and mulched.
For pest control, target issues early with barrier methods, beneficial insects, or spot treatments—never blanket sprays.
Keep tools organized in a ready-to-grab caddy. Rotate tasks by season, batch cleanups, and recycle compost to enrich soil.
If stresses arise, pause, assess drainage, and adjust irrigation.
Consistency beats intensity, delivering steady harvests with minimal effort.
Frequently Asked Questions
How Long Before I Can Harvest After Planting?
You’ll harvest in about 60 to 90 days after planting, depending on crops. Do soil preparation properly, and guarantee proper planting depth. Keep soil consistently moist, and monitor for pests, adjusting care as you grow for best results.
What Are the Best Beginner-Friendly Vegetables to Start With?
Begin with super-simple staples: beans, radishes, lettuce, and spinach. You’ll love quick wins. Practice companion planting, and test soil now to avoid surprises. Keep watering consistently, mulch lightly, and watch these hardy veggies flourish together.
How Often Should I Water a Raised Bed?
Water your raised bed when the soil moisture is about 60–70%—usually every 1–3 days in warm, dry spells, and weekly in cooler weather. Adjust based on rain, plant needs, and soil moisture, not a fixed schedule.
Do I Need Permits or Codes for a Backyard Bed?
Yes—you’ll likely need permits overview and must follow building regulations. Check your local zoning, HOA rules, and setback requirements; apply if required. You stay compliant, plan carefully, and build your backyard bed within permitted guidelines.
How Do I Prevent Pests Without Chemicals?
Yes—you can prevent pests without chemicals by using natural repellents and companion planting. Plant garlic, chives, and marigolds nearby, rotate crops, and attract beneficial insects with flowering plants for steady, practical pest reduction throughout your garden.
Conclusion
Trust this simple plan: pick a sunny spot, choose durable, food-safe wood, and build a sturdy 4×8 frame about 12–18 inches deep. Prep ground, place the frame, and fill with a balanced soil mix: mineral soil, compost, and a touch of mulch. Plant easy, fast-growing crops, water regularly, and mulch to lock in moisture. Keep it simple, save time with smart shortcuts, and watch your garden thrive—your green thumb is about to grow wings. Like a seed: it begins small.