You can update light fixtures without rewiring by evaluating your wiring, space, and goals, then choosing UL-listed, plug‑in or adapter options that match your existing circuit and lighting needs. Use safe mounting and conceal cords along joists or in conduits, opt for wireless controls for dimming, and follow manufacturers’ instructions to test all connections. The approach minimizes invasiveness, but you’ll want to confirm code compliance and keep a detailed record before you proceed.
Assess Wiring and Your Lighting Goals
Evaluating wiring and lighting goals begins with a quick inventory of what you already have and what you want. You assess current circuits, fixtures, and wiring paths to identify constraints and opportunities.
Verify existing wire gauge to guarantee compatibility with planned fixtures and anticipated loads; misrating can limit performance or create safety risks.
Inspect the circuit breaker panel for available slots, proper labeling, and corresponding amperage ratings.
Document any dimmer controls, switches, or occupancy sensors you’ll reuse, noting their compatibility with new fixtures.
Determine required lighting levels, color temperature, and distribution to guide fixture selection.
Map wiring routes, junction boxes, and accessibility for future maintenance.
Conclude by outlining a concise electrical plan, including load calculations and a clear sequence for installation.
Prioritize Plug-In and Battery-Powered Options
Prioritize plug-in and battery-powered options to minimize rewiring, simplify installation, and reduce downtime. You benefit from modular fixtures that run off existing outlets or batteries, enabling quick swaps without altering wiring. Choose fixtures with integrated drivers and interchangeable modules to maintain consistent performance.
Wireless controls enable dimming, scene selection, and automation without hard wiring, reducing code and junction box work. Assess battery-powered alternatives for spaces with limited access or temporary setups, ensuring battery life aligns with desired maintenance intervals.
Smart bulbs can retrofit older sockets, offering recent color, brightness, and scheduling features without fixture rewiring. Verify compatibility with your wall switches and outlets, and confirm FCC/UL compliance for safety and reliability.
Document installation steps for future replacements or upgrades.
Measure Space, Style, and Lighting Needs
To determine the right fixture, start by measuring the space and identifying lighting requirements you must meet. You’ll quantify ceiling height, wall area, and fixture outlet proximity to guarantee compatibility with non-rewiring options.
Define primary tasks: task lighting, ambient glow, or accent emphasis. Consider decor styles to harmonize with existing decor, avoiding styles that clash with room function.
Establish desired lighting ambiance by choosing color temperature and brightness targets for each zone. Note glare, shadowing, and uniformity across surfaces; draft a simple layout sketch with measurements and mounting constraints.
Ensure fixture dimensions fit clearances and don’t obstruct pathways. Record required controls (switch location, smart integration) and maintenance access.
This groundwork eliminates guesswork and guides precise, non-invasive fixture selection.
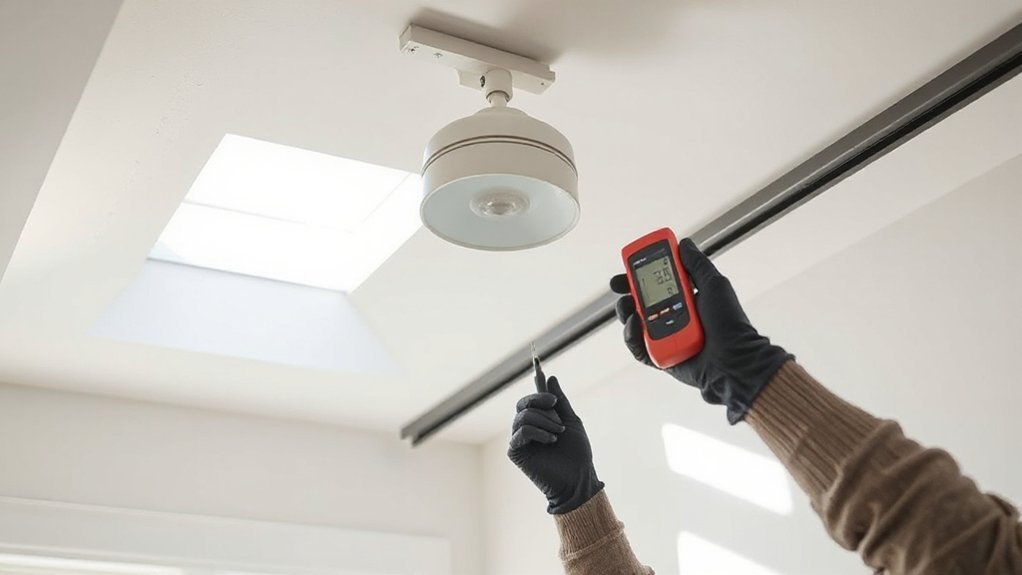
Choose Voltage, Wattage, and Dimming Correctly
You’ll verify voltage compatibility, ensuring your fixture matches your circuit’s rating and your device’s labeling.
Next, match wattage by selecting bulbs and fixtures within the recommended range to prevent overheating and nuisance trips.
Finally, confirm dimming compatibility across the control, bulbs, and fixture to maintain smooth operation and preserve brightness in your setup.
Voltage Compatibility Guide
When selecting a replacement fixture, guarantee the voltage, wattage, and dimming method are compatible with your system. Verify voltage rating matches supply nominal voltage (120V in many homes) and confirm any variances noted in your panel or transformer specs.
Assess circuit compatibility: ensure the fixture’s current draw stays within the branch circuit’s capacity plus protective device tolerance. Check listed wattage against fixture label and lighting efficiency, avoiding overloads during startup.
Dimming compatibility matters: if you plan to dim, confirm dimmer type (leading/trailing edge) aligns with the fixture’s dimmable circuitry and ballast where applicable.
Account for voltage regulation in your area; fluctuations can affect performance and longevity.
Document compatibility, and preserve standard wiring practices to prevent nuisance flicker or safety risks.
Wattage Matching Tips
Choosing the right voltage, wattage, and dimming method guarantees safe, reliable operation. You must verify fixture compatibility before installation to prevent overloads and shorten component life.
Match the fixture’s rated wattage to the bulb’s actual consumption, not the ballast or housing label alone, to avoid overheating. Consider wattage safety by selecting bulbs within the socket and ballast’s recommended range; exceeding it can trip breakers or degrade insulation.
If you’re replacing an LED retrofit, confirm the driver’s output aligns with the fixture’s input specifications and that any dimming control remains within configured limits.
Always account for total load on the circuit to preserve protection devices. Document the exact bulb type, wattage, and dimming compatibility for future maintenance and inspections.
Dimming Compatibility Essentials
Dimming compatibility starts with selecting the right voltage, wattage, and dimming method for each fixture. You must verify that the fixture’s rated voltage matches your supply and that the wattage doesn’t exceed the driver, dimmer, or circuit limits.
Choose a dimming method compatible with the lamp type (LED, incandescent, or CFL) and the driver’s capability, noting minimum load requirements.
Confirm the dimmer’s type (leading-edge, trailing-edge) aligns with the lamp’s electronics to avoid flicker or instability.
Guarantee the total wattage remains within circuit capacity and that all connections meet electrical safety standards.
Test with a low-load adjustment before full operation.
Document component specs for future maintenance, and keep clear labeling for replacements.
Dimming compatibility prioritizes electrical safety and reliable performance.
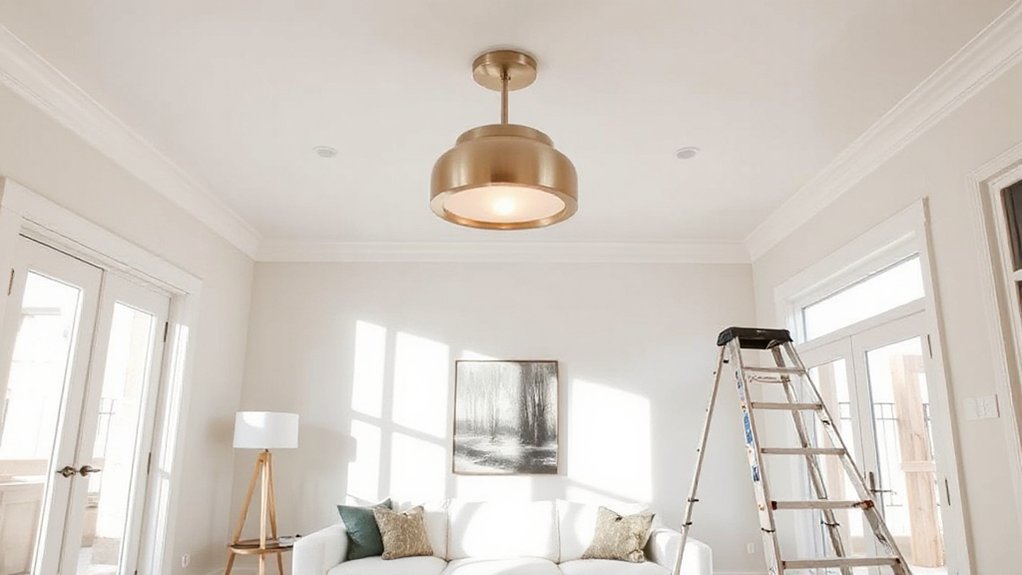
Pick Safe, Code-Compliant Plug-In Fixtures
You should choose plug-in fixtures that are safe to use and rated for your space, focusing on manufacturers’ safety certifications and proper electrical ratings.
Confirm the options meet local codes and align with standard lighting practices for plug-in connections.
Prioritize clear labeling, compatible plug types, and options that support your desired brightness and dimming without rewiring.
Safe Plug-In Fixtures
Safe plug-in fixtures offer a practical, code-compliant way to update lighting without rewiring. You’ll satisfy electrical codes by selecting UL-listed, cord-and-plug interfaces designed for dry locations, with correct amperage and overcurrent protection.
Choose fixtures that use standard 120-volt plugs, compatible with residential outlets, and confirm grounding is intact. Verify that cord sets and strain reliefs prevent tension on connections; mount brackets securely to a stable surface.
When wiring isn’t needed, you avoid modifying walls or ceilings, reducing risk and inspection issues. Consider vintage styles for aesthetic cohesion, while preserving safety margins.
For future control, look for options with Smart integrations that don’t require hardwired changes. Always follow manufacturer instructions and local codes for safe, compliant use.
Code-Compliant Lighting Options
Code-compliant plug-in fixtures are a practical, code-savvy option for updating lighting without rewiring. You’ll choose units rated for 120 V and compatible with your circuit. Verify fixture class, enclosure, and cord integrity, ensuring strain relief and proper grounding.
Use UL-listed adapters or cord-and-plug luminaires designed for your ceiling box type, avoiding daisy-chains or overloaded receptacles. When selecting, prioritize noted wattage, lumen output, and thermal design to prevent overheating.
Install per manufacturer instructions, maintaining clearances from insulation and combustibles. Smart controls can integrate with existing switches or wall boxes, offering dimming, timers, and occupancy sensing without altering the ceiling structure.
Decorative accents should complement room scale and color temperature, preserving safety margins while delivering consistent, code-compliant illumination. Maintain documentation for inspections and future upgrades.
Install Without Rewiring: Easy Steps
If you want to update a light fixture without rewiring, start by verifying compatibility with your existing box and wiring. Confirm box rating, load capacity, and mounting style to prevent overloading.
Identify fixture types in your space and match terminals, ground, and screw sizes to the new unit.
Disconnect power at the breaker before any handling, then test for voltage with a non-contact tester.
Remove the old fixture carefully, preserving mounting screws for reuse.
Install the new fixture’s mounting bracket, align with the box, and secure with appropriate screws.
Connect neutral, hot, and ground conductors according to the fixture’s wiring diagram, keeping wire nuts tight and insulation intact.
After mounting, restore power and probe for proper operation, ensuring wiring safety remains intact and any motion or dimming features function as designed.
Hide Cords and Use Adapters Neatly
To finish a clean update, focus on hiding cords and neat adapters after you’ve installed the new fixture. Begin with cord concealment by routing wires along joists or inside conduit when permitted, keeping paths tight and out of sight behind the fixture plate.
Use cable staples or adhesive clips to secure them at regular intervals, avoiding bends that could heat or wear insulation. Select adapters that fit the fixture’s electrical box and match wire gauges; prefer grounded, vibration-resistant options rated for your load.
Position adapters flush against the base, then conceal with a recessed canopy or dusk-plate cover to minimize visibility. Label connections for future service, and verify that all terminations are tight and compliant with local code requirements.
Budget, Efficiency, and Where to Buy

Budget considerations drive your fixture choice: you’ll balance upfront cost, operating efficiency, and long-term savings. You evaluate total cost of ownership, including bulbs, replacements, and disposal.
Prioritize LED options for energy use and lower heat output, then compare lumen output to ensure adequate illumination for your space.
In lighting design terms, select color temperature suitable for tasks and ambiance, aiming for CRI in the 80s for accurate color rendering.
When shopping, verify compatibility with existing wiring, dimmer compatibility, and fixture maintenance requirements. Seek reputable vendors offering clear warranties and spare parts.
Compare sources for price, availability, and lead times, avoiding impulse buys. Favor standardized components to simplify fixture maintenance and future upgrades.
Always document model numbers and install instructions for serviceability.
Frequently Asked Questions
Can I Install New Fixtures Without a Licensed Electrician?
Yes, you can, but you must consider Electrical permits and DIY safety. Verify circuit amperage, turn off power, use rated fixtures, follow box fill rules, and consult local codes. If unsure, hire a licensed electrician to avoid hazards.
Are There Weight Limits for Ceiling-Mounted Plug-In Lights?
Yes, there’s a weight capacity limit for ceiling-mounted plug-in lights. Check manufacturer specs for Fixture mounting limits, including total weight and anchor type. Confirm mounting hardware supports the fixture’s weight and distribute load evenly to prevent sagging.
Can I Convert Existing Wiring to Smart Plugs Safely?
Yes, you can, but you should only attempt this if you know DIY safety and electrical compatibility. Think of it like wiring a lamp; one wrong wattage sparks trouble. Confirm compatibility, use proper outlets, avoid overloads, test safely.
Will Plug-In Lights Affect Ceiling Fan or Thermostat Operations?
Plug-in lights can affect a ceiling fan only if load or wiring conflicts exist; expect potential ceiling fan compatibility issues and thermostat interference. Check manual specs, use proper wattage limits, and guarantee dedicated circuits to minimize cross-interference.
Do LED Plug-In Fixtures Require Special Dimmers or Adapters?
Yes, LED plug-in fixtures require attention to dimming compatibility and fixture compatibility, so verify that your dimmer supports LED loads and that the fixture is compatible with your ceiling setup; otherwise, use compatible dimmers or adapters.
Conclusion
Are you ready to upgrade safely without rewiring? In short, assess your wiring, choose UL-listed plug-in or battery-powered fixtures, and match voltage, wattage, and dimming to your needs. Prioritize easy installs, secure cords along joists or within conduits, and follow manufacturer instructions meticulously. Test all connections after installation and document details for future safety checks. By selecting code-compliant options and neat adapters, you’ll achieve brighter spaces with minimal disruption—will you start today?