Upgrading your roof insulation directly boosts your EPC score by cutting heat loss and improving thermal efficiency, so you’ll use less energy and stay more comfortable. You’ll need a precise assessment of your loft, appropriate materials, and careful installation to maintain airtightness without trapping moisture. Consider thickness, material type, and ventilation balance, then compare costs, grants, and a practical upgrade plan. Start the process now to release long‑term savings and regulatory benefits that matter for your property’s performance.
How Roof Insulation Affects Your EPC Score
Improving roof insulation directly boosts your EPC score by reducing heat loss and improving thermal efficiency. You’ll see higher energy performance ratings when the roof envelope minimizes thermal bridging and keeps indoor temperatures stable. Proper insulation thickness and material choice directly influence U-values, driving lower energy demand assessments. Roof ventilation remains essential to prevent condensation and mold risk, so you need balanced airflow that doesn’t compromise insulation performance. Compliance with insulation regulations ensures tested performance metrics and consistent labeling for EPC assessors. In practice, you should verify installation quality, seal air leaks, and address potential thermal bridging at perimeters. This targeted approach reduces energy use, lowers bills, and supports a more favorable EPC outcome without compromising occupant comfort.
Assess Your Current Loft and Climate Needs
Assess your loft conditions to determine insulation needs and potential heat loss. By matching your climate—with seasonal temperature variation and humidity—to your attic, you can prioritize upgrades that maximize efficiency. This assessment guides retrofit choices, ensuring the loft complements your overall energy strategy.
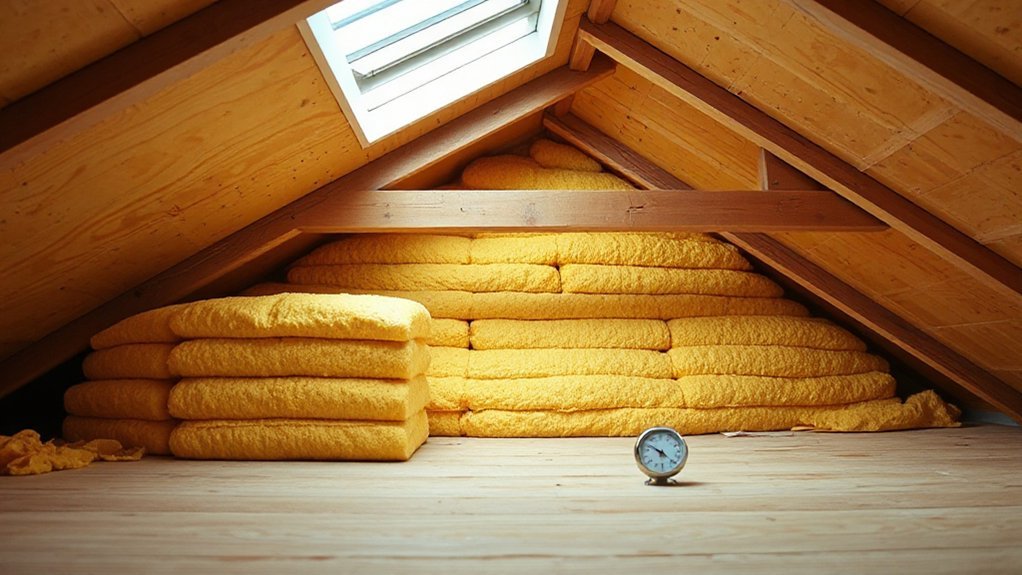
Assess Loft Conditions
To determine your loft’s insulation needs, start by evaluating both the current condition and your climate requirements; this groundwork guides every upgrade decision. You’ll inspect insulation depth, continuity, and gaps, noting any compression or settling that reduces thermal performance. Assess signs of moisture, mold, or pest activity, since these conditions jeopardize effectiveness and require remediation before upgrades. Check structural components, including rafters and joists, to confirm capacity for additional insulation without compromising roof integrity. Consider ventilation and airflow patterns to prevent condensation risk, ensuring enough Loft ventilation to maintain balanced humidity. Evaluate access for future work; secure Roof access points that allow safe, unobstructed installation. Document findings to prioritize upgrades and ensure measurable EPC improvement.
Match Climate Needs
How does your loft’s current climate profile align with your insulation goals, and what gaps exist between demand and capability? Your assessment should quantify temperature variance, moisture risk, and ventilation behavior across seasons, linking these metrics to performance targets like U-values and thermal comfort. Identify how roof color influences radiant heat gain and losses, and determine whether lighter or darker finishes would support steady temperatures with minimal energy penalties. Consider solar integration possibilities: prioritizing shading, reflective membranes, or radiant barriers that complement insulation depth without creating condensation risks. Map demand curves for heating and cooling against available loft capacity, then prioritize upgrades that close the mismatch—targeting air leakage reductions, appropriate venting, and compatible materials. This disciplined approach guarantees EPC-aligned upgrades with measurable, enduring benefits.
Upgrade Loft Insulation: Thickness, Materials, and Methods
To improve your loft’s performance, you’ll select the appropriate insulation thickness for your climate and current roof structure. Consider both material types—fiber, foam, and mineral wool—and their thermal resistance, moisture tolerance, and installation compatibility with your space. We’ll cover precise installation methods to guarantee airtightness and consistent coverage, setting you up for durable, code-compliant upgrades.
Loft Insulation Thickness
What thickness of loft insulation delivers the best balance of heat retention and cost? You’ll optimize performance by targeting practical ranges that minimize heat loss while staying affordable over the system’s life. In many homes, a thickness around the standard 270 mm (or the local Building Regulation minimum) yields strong insulation durability and predictable results, while avoiding excessive material use. The key is aligning thickness with existing joist spacing, timber constraints, and capillary risks to prevent bridging at edges. Consider ventilation and potential condensation risk, ensuring aesthetic considerations—visible ceiling lines and insulation depth—remain unobtrusive. Correct thickness supports long-term reliability and minimizes retrofit costs.
- You gain measurable energy savings without overspending now
- You preserve ceiling aesthetics and line integrity during upgrades
- You reduce future maintenance by avoiding thermal bridging
Materials For Loft Space
Selecting the right loft insulation materials is essential for achieving durable performance, minimal heat loss, and cost efficiency. You choose materials based on thermal resistance, moisture tolerance, and fire safety, aligning with your EPC goals. Mineral wool, glass mineral blends, and high-density fiberglass deliver strong fire performance and ease of handling, while rigid foam boards offer enhanced air tightness in applicable framing. Consider thickness-compatible densities to avoid settling gaps and guarantee long-term R-values. For existing lofts, flexible blankets contour to joists, reducing installation gaps, whereas loose-fill options excel in irregular spaces with minimal disruption. Decorative finishes can be applied in finished attic zones without compromising thermal integrity, and you should plan for hidden wiring or fixtures without creating thermal bridges. Also assess loft storage solutions to maintain insulation effectiveness around organized storage.
Insulation Installation Methods
If you’re upgrading loft insulation, choosing the right installation method is as crucial as selecting the material and thickness. Proper method guarantees consistent coverage, minimizes gaps, and preserves insulation compliance while maximizing performance. Select methods that suit your attic layout, access routes, and ventilation needs, preventing moisture buildup and heat loss. Quality control, fastening, and weatherproofing steps determine long-term effectiveness and EPC impact. Pay attention to roof ventilation impacts to avoid condensation risks, and document procedures for future audits.
- Align installation technique with attic geometry to achieve uniform R-values without compression.
- Prioritize continuous layers and intact ventilation paths, reducing thermal bridges and improving air-sealing outcomes.
- Establish verification checks, moisture considerations, and compliance records for ongoing insulation compliance and inspection readiness.
Seal Roof Junctions and Balance Ventilation for Airtightness
To guarantee airtightness, seal all roof junctions where deck, sheathing, and venting meet, and balance ventilation so that attic air inflows and outflows align with the design intent. You should identify every connection—between rafters, headers, penetrations, and vents—and treat each joint with compatible sealant, flashing, or tapes rated for continuous insulation. Prioritize continuous gasket or sealant at eave, rafter-to-ceiling, and vent exits to prevent air leakage paths. Validate ventilation balance by measuring intake and exhaust flows, adjusting bypasses or damper settings to meet the system’s design targets. Use integrated air barriers that coordinate with insulation strategy, ensuring no thermal bypass loops exist. This approach preserves performance, reduces draft, and sustains long-term EPC improvements through controlled airflow, consistent pressure, and durable performance at roof junctions. Roof junctions, ventilation balance.
Compare Insulation Materials: Fibreglass, Mineral Wool, and Rigid Foams

When choosing insulation materials, you’ll compare fibreglass, mineral wool, and rigid foams for performance, cost, and practicality in your roof assembly. You’ll assess thermal resistance, air barrier compatibility, and long-term stability to determine suitability for EPC targets. Each option offers distinct advantages: fibreglass is lightweight and economical but lower Insulation durability under compression; mineral wool provides superior fire resistance and sound control with robust durability; rigid foams deliver high R-values per inch and excellent moisture resistance yet may raise cost and affect material recyclability. Evaluate installation ease, compatibility with vapour barriers, and environmental impact to optimize assembly performance.
1) Fibreglass vs mineral wool vs rigid foam—which aligns with your priorities and space constraints?
2) Durability, recyclability, and maintenance implications shape lifecycle choice.
3) Final pick supports consistent energy performance and compliance.
Costs, Grants, and a Step-by-Step Upgrade Plan
Costs, grants, and a step-by-step upgrade plan should be treated as the roadmap for your roof insulation project: they translate budget realities, funding opportunities, and actionable actions into a clear sequence that minimizes risk and maximizes return. You begin with cost considerations, auditing materials, retrofit methods, and installation labor to establish a baseline total. Next, assess grant opportunities from government schemes, utility programs, and local incentives to reduce outlay without compromising performance. Then, map each upgrade stage—assessment, design, procurement, installation, and verification—into discrete milestones with cost and benefit tags. Track progress against the plan, adjusting for price volatility and supply constraints. Finally, document savings, performance gains, and grant outcomes to validate the project’s EPC improvement and financial viability.
Frequently Asked Questions
How Long Does a Loft Insulation Upgrade Typically Take?
A typical loft insulation upgrade takes a day or two, depending on loft size and access. You’ll measure thermal resistance gains, compare insulation materials, and guarantee gaps are sealed; you’ll see improved efficiency as the installation progresses.
Will Upgrading Loft Insulation Affect Room Height or Ceiling Space?
Upgrading loft insulation won’t noticeably affect room height or ceiling space. You’ll preserve headroom while enhancing efficiency; guarantee proper attic ventilation and select insulation material options that fit between joists, avoiding compression and preserving airflow.
Can I Install Insulation Myself or Must I Hire a Pro?
In 7 out of 10 homes, DIY installation leads to uneven coverage, so you should know this: you can, but for safety and compliance, opt for professional assessment if you’re unsure. You’ll benefit from precise, measured results.
Are There Health Considerations With Fibreglass or Mineral Wool?
Yes, there are health risks with fibreglass or mineral wool; insulation safety matters. You should minimize dust and skin contact, wear protective gear, seal clothing, and follow manufacturer guidelines to reduce irritation and inhalation exposure.
How Do I Verify Post-Upgrade EPC Improvements Reliably?
To verify post-upgrade EPC improvements reliably, you reference an energy assessment and follow the Certification process, ensuring measured gains align with modelled forecasts, submit documentation, and verify with a certified assessor for accredited, reproducible results.
Conclusion
When you upgrade your loft insulation, coincidence plays a quiet role: the moment you improve the seal, your EPC ticks higher just as your comfort rises. You’ll notice lower bills and steadier temperatures, nearly in sync with the documentation you’ve prepared. By matching thickness, material, and airtightness to your climate, you align performance with cost savings. Act now, document every step, and let precise workmanship turn chance into measurable energy efficiency gains.