Basement waterproofing in flood-prone areas combines exterior barriers and interior controls to minimize intrusion. You’ll evaluate grading, drainage, and surface water direction, then select continuous exterior membranes or perimeter drainage, plus interior seals and sump provisions as needed. Evidence-based planning, cost, and timing influence options, from wall and floor sealing to humidity management and backup power. The choices interact with yard drainage and maintenance, so a practical path emerges—but you’ll want to confirm specifics before committing.
Why Basements Flood: Causes, Signs, and Your First Steps
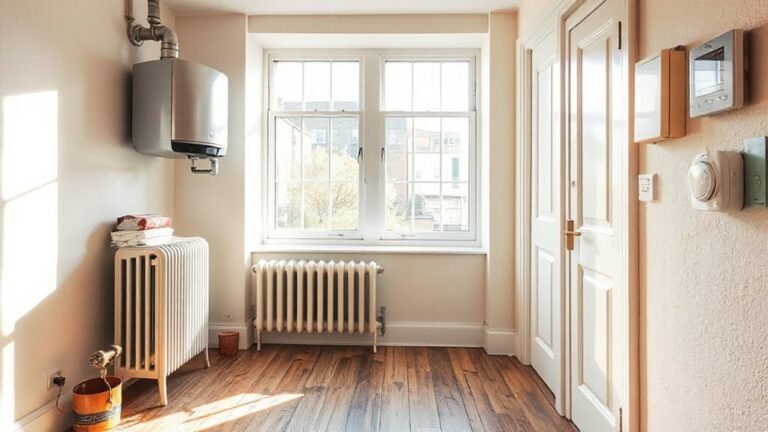
Basements flood when groundwater and surface water intrude or when indoor moisture accumulates beyond what the space can tolerate. You should identify primary drivers, including high water tables, heavy rainfall events, and permeable soil surrounding the foundation. Structural cracks, improperly sealed joints, and defective sump systems can allow water ingress despite intact barriers. Signs include damp walls, efflorescence, musty odors, concentrated water staining, and elevated humidity. Early steps emphasize immediate mitigation: stop the water source, deploy temporary barriers, and document conditions for remediation planning. To reduce recurrence, implement balanced ventilation (basement ventilation) to manage humidity while avoiding inadvertent moisture draw from outside. Emphasize mold prevention through prompt cleanup, filtration, and keeping surfaces dry after wet periods. Maintain records to guide professional evaluation and targeted waterproofing strategies.
Assessing Your Yard: Grading, Downspouts, and Surface Drainage
How does proper yard assessment prevent basement moisture issues? You evaluate grading and drainage patterns with objective measurements, not impressions. In practice, you verify that yard grades slope away from the foundation, typically a minimum 2% (1/4 inch per foot) for several feet, to reduce hydrostatic pressure. You map surface drainage routes, noting low spots, runoff concentration points, and nearby impervious surfaces that impede infiltration. Inspect downspouts and extensions, ensuring discharge directs water at least 4–6 feet from the foundation and into landscape beds or drainage swales. Document drainage separations between permeable and nonpermeable zones. Use level or laser tools to confirm elevations, and adjust as needed. Emphasize Yard grading and Surface drainage concepts tied to flood-prone performance, avoiding speculative remedies.
Exterior Foundation Waterproofing: Systems That Last
Exterior foundation waterproofing must endure through hydrostatic pressure, temperature cycles, and soil movement; selecting robust systems requires evaluating barrier continuity, drainage integration, and compatibility with landscaping. You pursue options that form continuous moisture barriers beneath grade, with seamless connections at joints and penetrations to prevent leaks. Moisture barriers should be rated for soil chemistry and seasonal wetting, and installation must minimize voids that trap water. Consider exterior membranes, reinforced sheet membranes, and integral coatings that resist puncture and chemical attack, paired with proper drainage compliments. Basement insulation should be placed to reduce condensation risk without compromising barrier performance. Verify warranty coverage, installation quality, and long-term maintenance requirements. Choose systems proven to resist weathering, soil expansion, and backfill stress, ensuring durable, watertight performance.
Exterior Wall Drainage: French Drains and Perimeter Systems
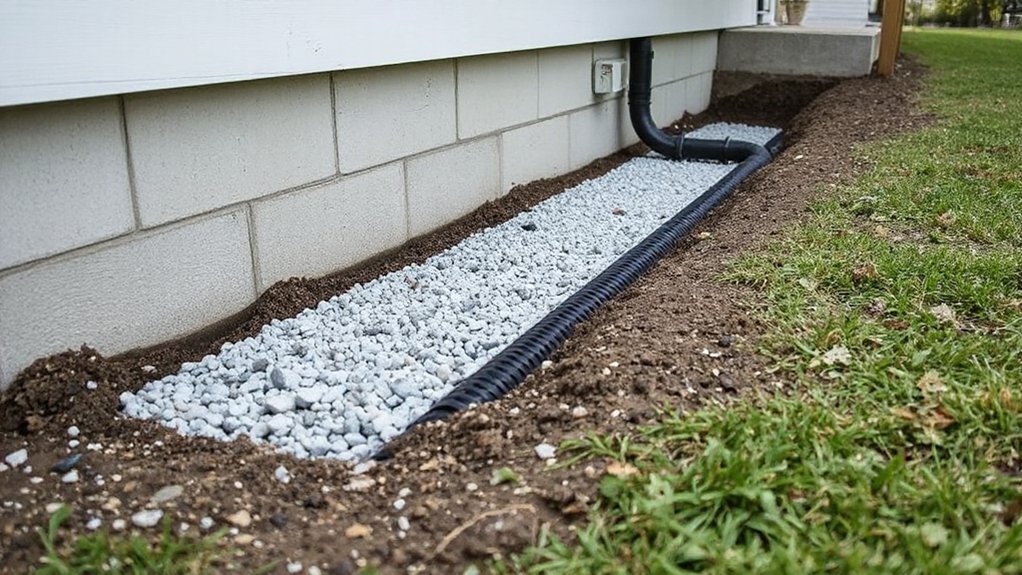
If exterior wall drainage is needed, French drains and perimeter systems provide a continuous pathway to move water away from the foundation, reducing hydrostatic pressure on basement walls. You install perforated piping beneath graded gravel, surrounded by filter fabric to prevent sediment intrusion, then connect to an outlet or sump as required. Perimeter trenching captures subsurface inflow along the foundation line, limiting foundation moisture exposure and guiding water toward safe discharge. Proper design accounts for soil variability, drainage coefficients, and traffic-free zones to prevent trench collapse and guarantee long-term stability. Foundation cracks guide placement and continuity of the system, while soil stability dictates trench depth and backfill spec. Regular inspection confirms seal integrity at joints and minimizes recharge into the wall assemblage.
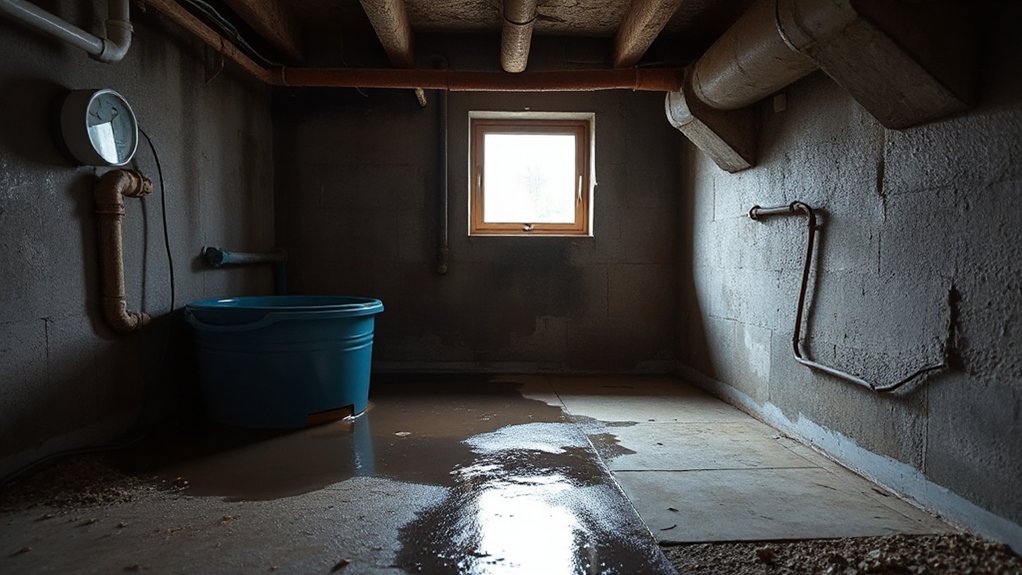
Interior Wall and Floor Seals: Blocking Moisture Intrusion
Interior wall and floor seals form sealed interior barriers that limit moisture transfer from the concrete to the living space. You’ll assess floor-to-wall joints and seam seals to prevent capillary moisture migration and monitor for any moisture transfer indicators. Key considerations include selecting compatible sealants and joint configurations to maintain long-term effectiveness across floor-floor, wall, and seam interfaces.
Sealed Interior Barriers
Sealed interior barriers consist of moisture-resistant seals applied to walls and floors to block water vapor and liquid intrusion from the interior side of a basement. You implement interior sealing with chemically resistant tapes, sealants, and gasketed joints designed to resist hydrostatic pressure and capillary rise. This approach creates a continuous moisture barrier across interior surfaces, reducing vapor diffusion paths and limiting localized damp spots. Applied products must meet relevant standards for adhesion, temperature tolerance, and moisture resistance, with surface preparation documented to guarantee seal integrity. Effectiveness hinges on proper curing, joint treatment, and detailing at penetrations, edges, and floor-to-wall transitions. While interior sealing reduces vapor diffusion, it does not replace exterior drainage or active mitigation in flood-prone zones. Moisture barriers require ongoing inspection and maintenance.
Moisture Transfer Prevention
Moisture transfer prevention relies on interior wall and floor seals that block both vapor diffusion and liquid ingress before they reach essential interior spaces. You implement these seals to enforce a continuous moisture barrier across reinforced concrete, masonry, and slab-on-grade interfaces. Sealants must be compatible with existing substrates, cure without shrinkage, and maintain elasticity under temperature fluctuations. In practice, you assess potential pathways, including hairline foundation cracks, and apply crack-impermeable coatings or injectable emulsions to arrest ingress at source. Moisture barriers should extend to abutting floors and joints, creating a seamless layer that resists hydrostatic pressure. You validate performance with moisture flux testing and confirm long-term durability through material provenance, installation quality, and adherence to manufacturer specifications.
Floor-Cloor Joint Seals
Floor–floor joint seals provide a continuous interior barrier at the interface between adjacent slabs, preventing vapor diffusion and liquid intrusion where floors meet walls or other structural members. You evaluate joint conditions, including substrate compatibility, dimensional tolerance, and risk of movement. Select a moisture-compatible sealant with low shrinkage and proven adhesion to concrete, epoxy, or polyurethane substrates. For sealant application, prepare the joint by cleaning, profiling, and drying, then prime if required by the product data sheet. Use backer material to control bond line and accommodate movement, typically 25–50% of expected joint travel. Apply in controlled temperatures and avoid sealing over standing water. Cure per manufacturer instructions, test for continuity, and document installation details for future maintenance and performance verification.
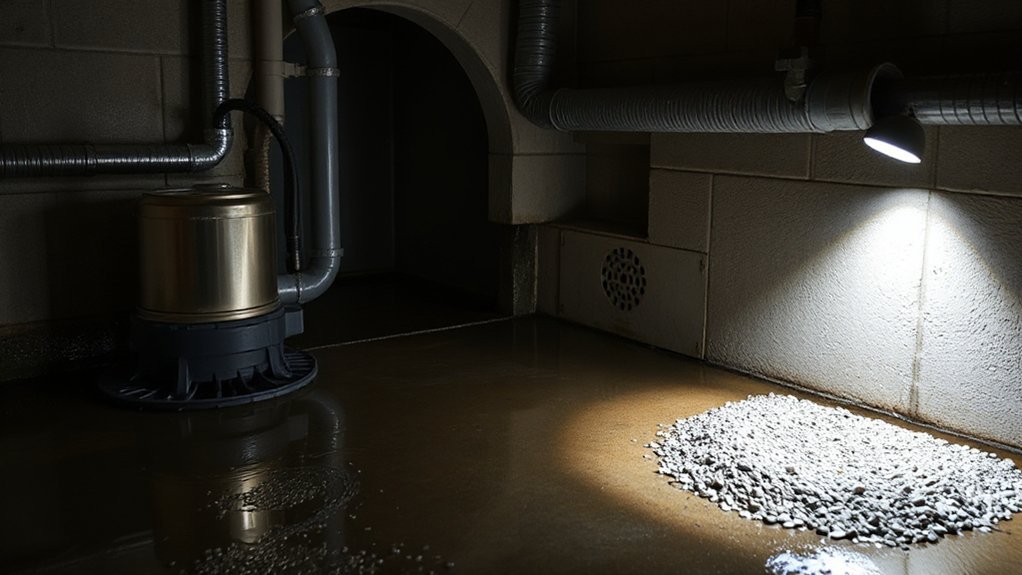
Sump Pumps and Backups: Choosing and Sizing for Your Home
You’ll start with a Sump Pump Sizing Guide to match your home’s flow rate, drainage area, and rainfall risk, ensuring the unit handles the peak expected volume. Consider Backup Power to maintain operation during outages, and map a robust Discharge and Drainage Plan that keeps discharge away from foundations andite staff areas. This discussion integrates practical sizing, power redundancy, and drainage layout to support reliable basement protection.
Sump Pump Sizing Guide
Sizing a sump pump correctly is essential to protect your basement from water intrusion; to choose the right unit, you must consider flow rate, anticipated rainfall, and groundwater conditions for your home. You’ll determine required pump capacity by calculating peak discharge from drainage basins and soil permeability, then selecting a model with a margin for clog events and pump wear. Use a vertical lift assessment to verify head pressure, and confirm that the pump’s duty cycle matches seasonal wet periods. Integrate system design with waterproofing membranes and drainage systems to guarantee effective water removal from the sump to discharge point. Verify electrical reliability, supervisor alarms, and maintenance access to sustain performance during storms. Document calculations and monitor performance after installation.
Backup Power Considerations
Backup power is essential for sump pumps to maintain operation during electrical outages or power surges, so you should plan for a reliable power source that aligns with your pump’s duty cycle and your home’s electrical infrastructure. You evaluate whether a standby generator, portable generator, or battery backup meets your flood exposure, load requirements, and run-time goals. Size to sustain continuous pumping during peak rain events, considering inlet, switch, and check-valve losses. Implement automatic transfer switching to minimize manual intervention and outages. Regular generator maintenance—fuel stability, oil changes, thermostat and sensor checks, and load testing—prevents failure when you need it most. Document maintenance intervals and test cycles, and schedule quarterly self-checks to verify responsiveness and electrical code compliance.
Discharge And Drainage Plan
To prevent basement flooding, establish a clear discharge and drainage plan that governs where water exits and how runoff is directed away from the foundation. You’ll size sump pumps and backups to meet peak rainfall and groundwater pressures, using a factor of safety per local codes. Choose pumps with adequate head and flow, plus automatic switches and battery or generator backups to maintain operation during power outages. Determine discharge routes that avoid reintroduction into the home or neighboring properties, incorporating rainfall intensity data, soil permeability, and floodplain considerations. Implement rainwater harvesting where practical to reduce surcharge and monitor performance over time. Integrate floodplain management practices such as valve checks, backflow prevention, and regular system testing to validate reliability and prevent unintended backflow.
Humidity Control: Dehumidifiers, Ventilation, and Insulation

Humidity control is essential in basement waterproofing because high moisture levels drive mold growth, wood rot, and structural degradation; using dehumidifiers, proper ventilation, and insulation together reduces relative humidity to safer ranges.
- Select a high-capacity, energy-efficient dehumidifier sized for basement air exchanges and continuous operation under flood-prone conditions to maintain RH around 40–60%.
- Enhance ventilation with balanced intake and exhaust, ensuring cross-ventilation paths that remove damp air without drawing in outside humidity during rain events.
- Apply moisture barriers on walls and floors to minimize vapor diffusion, pairing with perimeter insulation to limit heat loss and condensation.
- Integrate insulation strategies that reduce thermal bridges, support stable interior humidity, and improve overall indoor air quality.
Planning a Renovation: Costs, Timelines, and Zoning Considerations
Planning a renovation requires a clear, evidence-based assessment of costs, timelines, and zoning implications to guarantee feasibility and compliance. You should perform a formal cost analysis that itemizes materials, labor, contingency, and permit fees, then compare alternatives for return on investment and risk reduction. Timeline planning must align with contractor schedules, weather windows, and utility access, producing a critical path that identifies dependencies and milestones. Zoning considerations influence setback, permitted work, and floodplain amendments, so verify code allowances, variances, and enforcement districts before design finalization. Document assumptions, data sources, and validation methods to support decisions. Integrate phased work if necessary to minimize disruption and cash flow spikes. Ascertain permits, inspections, and record-keeping are established to sustain compliance throughout construction.
Maintenance, Monitoring, and Early Warning Signs
Regular maintenance and proactive monitoring are essential to prevent basement water damage and extend waterproofing effectiveness. You should implement systematic checks that track performance, verify seals, and confirm drainage paths remain unobstructed. Early indicators—unexpected damp spots, new efflorescence, or gradual water pooling—call for immediate action to avoid deeper damage. Reliable monitoring relies on sensor maintenance and calibrated alarm systems that distinguish routine moisture variation from critical events. Document findings to guide timely repairs and validate warranty coverage.
- Inspect sump pumps and discharge lines for debris and proper cycling
- Test sensors regularly, replace faulty units, and log readings
- Confirm alarm systems trigger at defined thresholds and propagate alerts
- Review exterior grading and drainage, noting changes after rainfall events
When to Hire a Pro: Qualification Criteria and Red Flags
Determining when to hire a pro hinges on clear qualification criteria and identifiable red flags that exceed DIY capabilities. You assess contractor credibility by confirming professional credentials, including state license, binding insurance, and industry certifications from recognized bodies. Compare written estimates for scope precision, material specs, and warranty terms; vague bids signal risk. Red flag indicators include pressure-tactic selling, insistence on upfront full payment, and requests for unregistered subcontractors. Require a detailed, site-specific assessment with documented moisture measurements, drainage plan, and soil stability notes. Verify project history with references and prior installations similar to your conditions. Evaluate post-installation support, maintenance schedules, and transferable warranties. If any criterion fails, pause and re-solicit qualified bids. You protect investment by prioritizing evidence-based decisions over aggressive marketing.
Frequently Asked Questions
What Indicators Necessitate Professional Waterproofing Beyond DIY Fixes?
You need professional waterproofing when you notice repeated flooding, structural cracks, mold growth, or moisture >60% RH, despite DIY fixes; DIY pitfalls exist, and a professional can guarantee proper drainage, sealing, and durable repairs. Cost comparison matters; proceed carefully.
How Long Do Common Exterior Waterproofing Systems Last?
You’re asking how long exterior systems last. Generally, you can expect 15–25 years for waterproof coatings and 20–40 years for membranes, depending on foundation cracks and drainage solutions, maintenance, and soil conditions, with proactive inspections extending life.
Can Interior Seals Cause Moisture Problems Elsewhere in the Home?
Interior seals can alter moisture migration, potentially pushing humidity to upper rooms if not properly installed or vented. You should monitor humidity, inspect for condensation, and make sure seals don’t trap moisture that could encourage mold or wood rot.
Do Sump Pumps Require Backup Power or Generators?
Yes, you should guarantee backup power for a sump pump. Regular sump pump maintenance is essential, and backup power options—such as battery backups or generators—keep operation during outages, preventing basement flooding when power fails.
Are There Tax Credits or Incentives for Basement Waterproofing?
Tax incentives exist in some regions, but eligibility varies; you may qualify for credits or deductions if basement waterproofing addresses safety or energy efficiency. You’ll assess Financial benefits and cite documentation to maximize tax incentives and economic returns.
Conclusion
Concluding, you’ll shore up your basement most effectively by combining exterior waterproofing with interior moisture control and sound drainage. Exterior membranes, continuous drainage, and proper grading halt most intrusions before they reach your walls. Inside, sealants, sump pump backup, and dehumidification prevent residual moisture and mold growth. An interesting stat: homes with proper perimeter drainage reduce basement flooding risk by roughly 40–50%. Regular maintenance and early warning checks keep systems reliable and costs predictable over time.