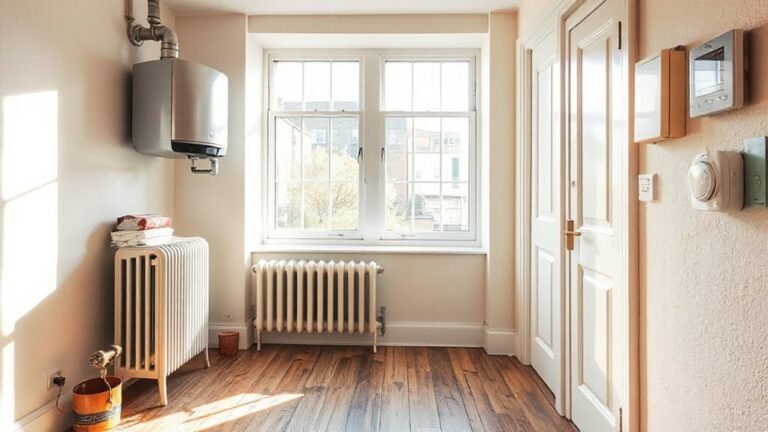
You can add texture to your walls without repainting by working with your existing surface and simple tools like sponges, brushes, or a lightweight stucco-float. Clean, dry, and prime first, then mask nearby areas. Work in small sections, building patterns or stipple effects as you go, and finish with a clear sealant if desired. Keep tools clean to maintain control, and plan how the texture will align with lighting and decor—there’s a practical path here you’re just starting to map out.
Decide the Right Wall Texture for Your Space
Choosing the right wall texture starts with the room’s function and lighting. You weigh duty, mood, and how you’ll use the space day to day.
For high-traffic areas, opt for durable options with cleaner lines and easier maintenance. In living areas, choose textures that soften or enhance natural light without overwhelming the palette. Consider wall texture patterns that add subtle depth, like delicate plaster or fine grasscloth, rather than loud visuals.
For bedrooms, prioritize calm, warm finishes that reduce glare and feel inviting. Material choices matter: gypsum, cement, fabric, or vinyl accents each react differently to impact and humidity.
Balance your budget with longevity, so you don’t compromise on upkeep. Decide textures that support furniture and art without competing.
Weekend-Worthy Techniques You Can Try Now
Weekend projects let you test textures without committing to a full renovation. You can mix quick methods that yield tangible results, so you feel the texture rather than just see it.
Start with simple stippling using a stiff brush or sponge to add subtle depth on plaster or drywall. For more punch, try a lightweight stucco-float technique in small patches, keeping edges crisp.
Taping a grid with painter’s tape lets you control pattern size and repeatability. Always prep a test wall: clean, dry, and prime if needed, then document what you like.
Gather DIY tools, from a putty knife to a roller, and keep your workspace tidy. Safety precautions matter: ventilate, wear goggles, and protect floors and furniture from splatters.
Texture Without Mess: Easy Prep and Application Tips
Getting texture without a mess starts with smart prep and clean, controlled application. You’ll minimize chaos by laying drops, masking edges, and taping off adjacent surfaces before you start.
Gather DIY tools: a putty knife, textured roller, or stencils, plus a lightweight drywall compound or joint compound suited to your chosen texture types.
Work in small batches to prevent drying waste and tool buildup. Apply an even base coat and let it set to the point you can touch without denting.
Use a controlled motion, not brute force, to avoid overworking the surface. Maintain steady pressure, and rotate textures if you’re testing styles.
Clean tools immediately; residue hardens fast. Finish with a light, dry brush to catch ridges and texture nuances.
Finish Strong: Color, Ceiling Height, and Decor Coordination
Color ties the texture to the room, so pick a shade that complements your wall texture and existing decor. You’ll want color harmony that feels intentional, not accidental. Start by testing tones on small patches near the texture to see how light shifts it throughout the day.
Choose a ceiling color that reads as an extension, not a break; ceiling integration often means a shade lighter or a subtle cool/neutral for balance. Keep trim and built-ins in a coherent family to avoid visual busywork.
Use decor elements—art, textiles, and furniture—that echo your chosen hue, texture, and finish. In practical terms, let color guide the eye upward and inward, creating a cohesive, calm backdrop for your textures.
Troubleshooting and Maintenance for Textured Walls
Textured walls aren’t maintenance-free, but a few practical checks keep them looking sharp. You’ll keep texture intact by inspecting for wall damage, like cracks, chips, or loose patches, and addressing them before they worsen.
Vacuum crevices gently with a brush attachment, then spot-clean with a mild solution to prevent dirt buildup. When you notice stubborn grime, switch to a clean, damp microfiber cloth and follow the grain of the texture to avoid dulling it.
Avoid abrasive pads that can fray the surface. For repairs, use matching texture compound and a small trowel, then re-seal with a light coat of paint to blend.
Regular cleaning techniques reduce staining and extend life, so schedule quarterly checks and touch-ups as needed.
Frequently Asked Questions
Can Texture Affect Room Acoustics and Soundproofing?
Yes, texture can affect acoustics. You’ll improve sound absorption with textured surfaces and absorb higher frequencies, aiding noise reduction. Use panels, fabric, or irregular textures strategically to dampen echo and create a calmer, more focused room.
Which Textures Hide Wall Flaws Best?
You’ll want textures with depth and irregularities that mask wall imperfections, using bold patterns or heavy stippling. Texture concealment works best with tactile surfaces like plaster, mud, or thick fabric-backed treatments, reducing light reflection and smoothing perceived flaws.
Are There Budget-Friendly DIY Texture Alternatives?
You’ll find cost effective DIY methods right here; think sparing, practical texture options. You start with wall prep, then layer light materials. You’ll create tactile depth without repainting, using affordable patterns, and you’ll stay budget-conscious, confident, and efficient.
How Durable Are Textured Finishes Over Time?
Textured finishes hold up well with proper care; expect years of durability if you do wall preparation and sealant correctly, then maintain texture maintenance by gentle cleaning and timely repairs to cracks or loose areas.
Can Texture Impact Resale Value or Appraisals?
Texture can affect resale value, but not as dramatically as condition and style. You’ll improve appeal with tasteful wall texture, and you’ll know you’re maximizing resale value when buyers notice durable, well-executed details—think tactile, modern, timeless. futuristic.
Conclusion
Texture your walls without repainting, and you’ll transform a room in hours. Start with a clean, primed surface, then dab, stipple, or float in small sections for control. Finish with a light sealant if needed and keep tools clean for next time. Think of texture as a painter’s fingerprint—a subtle, tactile map that adds depth without masking your space’s light. You’ll get a refreshed look that respects color, height, and decor.