Imagine stepping into a room where the fireplace feels like a quiet stage awaiting its spotlight. You’ll shape the look with intent, pairing heat-safe materials, a restrained mantel, and subtle lighting to define texture and mood. If you’re aiming for a cozy, modern, or classic vibe, small tweaks—paint, tile, greenery, or metallic accents—can transform the focal point without overwhelming the space. Curious how to map your goal and constraints to a cohesive makeover?
Define Your Fireplace Makeover Goal and Constraints
Before you start any makeover, define your goal and constraints clearly. You’ll determine the scope, timeline, and budget upfront, which sharpens decisions and prevents scope creep.
Pinpoint what your fireplace must achieve—cozy focal point, improved energy efficiency, or a modern look—then set measurable constraints for materials, ventilation, and installation steps.
Consider the space’s architecture and how the new appearance will harmonize with existing furnishings.
Map essential actions, including Fireplace maintenance tasks and periodic inspections, so safety isn’t an afterthought.
Identify nonnegotiables and nice-to-haves, then prioritize accordingly.
Document safety considerations, clearance requirements, and approved finishes.
With goals and limits aligned, you’ll approach choices confidently, avoiding regretful tweaks later while preserving aesthetic integrity and safety throughout the project.
Choose a Fireplace Makeover Style
Choosing a makeover style sets the tone for your entire project, so start by aligning you with your room’s architecture and color palette. You’ll define a direction that harmonizes with existing features and your personal taste.
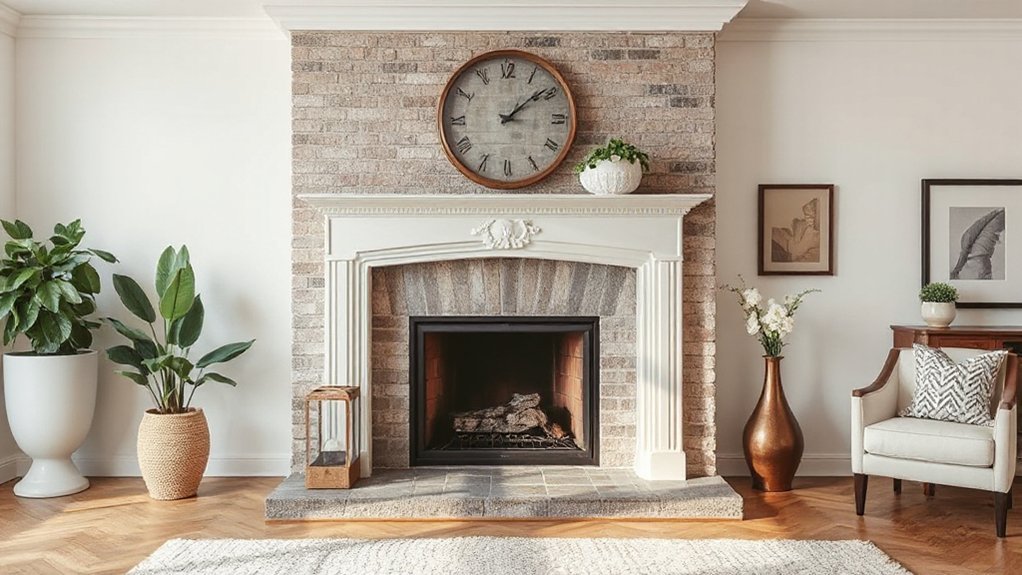
Consider three core approaches: timeless classic, modern minimal, and cozy cottage. For a timeless look, favor neutral tones, refined textures, and balanced proportions that endure shifts in trends.
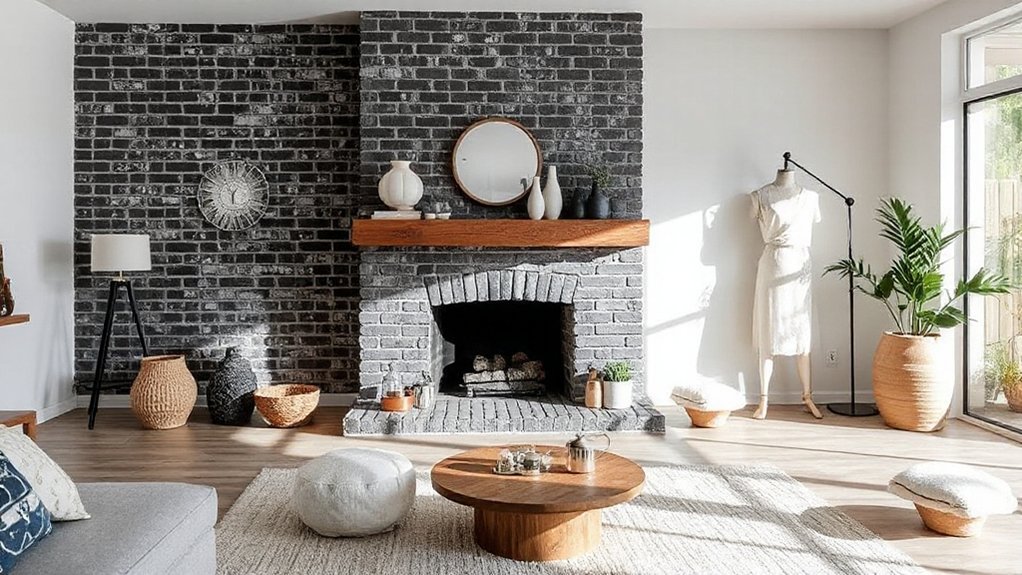
Go modern minimalist with clean lines, restrained ornament, and a focal point highlighted by negative space.
If you crave warmth, embrace cottage-inspired details, soft finishes, and tactile materials.
When selecting style, plan how your Fireplace color integrates with surrounding surfaces and how Fireplace accessories—tools, mantels, and trim—will read as deliberate design moves.
Finalizing a mood board can help lock in a cohesive, intentional makeover.
Assess Space and Structural Constraints
Evaluating space and structural constraints is your reality check: you must understand the room layout, clearances, and load-bearing limits before you draw inspiration.
Start by mapping where the fireplace sits, how traffic moves, and what existing materials encroach on the zone.
Assess adjacent finishes, electrical outlets, and ventilation needs to avoid conflicts with new layouts.
Check surrounding walls for studs and potential moisture that could influence veneer or inset designs.
Consider fireplace venting options and whether a simple surround, built-ins, or a full facade aligns with structural support.
If you’re adapting an existing chimney, evaluate access for maintenance and potential chimney repairs before drafting any design.
Prioritize safe clearances, stable mounting points, and future access for upkeep.
Budget-Friendly Fireplace Materials and Techniques
You can stretch your budget with smart material choices that still look polished. We’ll cover budget-friendly options and accessible DIY techniques that deliver strong, lasting results.
Start with practical priorities—surface durability, heat safety, and a cohesive final aesthetic—to guide every decision.
Budget-Friendly Materials
Budget-friendly options can transform a fireplace without breaking the bank. You’ll prioritize materials that deliver impact with minimal cost, focusing on surface upgrades over structural changes.
Choose economical options like high-heat resistant paint for a fresh coat, or explore laminate panels and beveled MDF trim to simulate masonry with clean lines. When selecting materials, opt for neutral tones that enhance light and space, then add texture with decorative accents to create depth without overwhelming the room.
Consider repurposed or affordable, heat-safe tiles for a subtle focal point, ensuring surface seams are tight and clean. Plan around product life and warranty, and verify compatibility with your existing surround.
Use fireplace paint and decorative accents to unify style, elegance, and durability.
DIY Techniques Overview
There are simple, high-impact methods you can use with budget-friendly materials to transform a fireplace without replacing the surround. You’ll prioritize durable, heat-resistant finishes and precise measurements to avoid costly mistakes.
Begin with a clean surface, then assess whether you need a veneer, tile, or faux brick to achieve your target style. Select materials that tolerate heat and cleaning agents, and verify warranty requirements.
Apply low-profile, seam-free options to maintain a cohesive look, and install trim to hide gaps between the surround and mantel.
Maintain strict fireplace safety by avoiding combustible fillers beyond code, and consult manufacturer guidelines for heat exposure.
When in doubt, seek professional consultation to confirm substrate compatibility, installation method, and long-term performance without compromising aesthetics.
Quick Fireplace Tile, Mantel, and Surround Updates
Updating a fireplace quickly can dramatically lift the room: swap in a sleek tile, trim the mantel, and redefine the surround to create a cohesive, modern punch without a full renovation. You’ll keep the core structure intact while selecting materials that read current and timeless.
Choose tile with a clean line, a light grout, and a subtle texture to reflect light and widen the space. For the mantel, consider a slim profile or painted wood in a neutral tone to reduce visual weight.
Surround updates should be decisive: a crisp hearth edge, minimal trim, and cohesive color. Add fireplace accessories and seasonal decorations to finish the look without clutter.
The result is polished, intentional, and visually expansive.
Lighting to Elevate the Fireplace Focal Point
Layered light techniques create depth by layering task, accent, and ambient sources around your fireplace.
Highlight focal materials—stone, brick, or metal—with directional sconces or spot lights to draw the eye where you want it most.
Pair an ambient glow with subtle wall or recessed lighting to keep the mood elegant and cohesive while the hearth remains the undeniable centerpiece.
Layered Light Techniques
A layered lighting plan anchors the fireplace as the room’s focal point by combining ambient, task, and accent light to sculpt depth and mood. You harness ambient glow to frame the silhouette, then add task beams for practical, targeted illumination near seating and surfaces.
Accent lighting, carefully positioned, carves architectural drama and draws the eye inward. Use dimmers to modulate intensity, preserving warmth while enabling different atmospheres.
Prioritize color layering by selecting bulbs with complementary temperatures to avoid flat, washed-out results; warm whites pair well with natural textures, while cooler accents highlight contrast.
Keep fixtures proportionate to the fireplace scale, letting symmetry guide placement. Integrate hidden LEDs for subtle edge light, and opt for narrow-beam accents to avoid glare, maintaining a refined, cohesive focal point.
Highlight Focal Materials
Highlighting the focal materials starts with the right lighting strategy that celebrates texture and color. You select fixtures that echo the fireplace’s core materials—brick, stone, metal, or wood—while avoiding glare that dulls texture.
Use directional LEDs to sculpt shadows and emphasize grain or seams, not simply illuminate. Consider warm white tones to enhance earthy hues and cool tones to modernize industrial finishes.
Layer accents, such as backlighting behind a mantle or subtle under-fireplace lighting, to draw the eye toward the centerpiece without overwhelming it.
Prioritize fireplace safety by avoiding heat-intensive fixtures near combustibles and choosing rated, enclosed options. Material durability matters too; opt for durable, fade-resistant finishes and moisture-tolerant hardware if the surround is damp or high-traffic.
Ambient Glow Strategies
Ambient glow isn’t about brightness alone; it’s about shaping ambiance that draws the eye to the fire’s centerpiece. You’ll optimize lighting by layering sources: a dimmed overhead, task lamps at eye level, and softly glowing accents along the mantle.
Choose warm temperatures (2700–3000K) to mimic natural flames without harsh glare. Hide mismatched wires and guarantee cords stay tidy for a clean, intentional look. Use dimmers to modulate intensity as seasons shift, and coordinate with seasonal decoration—think seasonal garlands, greenery, or metallic accents that reflect flame light.
Prioritize fireplace safety by selecting heat-safe fixtures and keeping combustibles at a safe distance. The result is a balanced focal point that feels curated, calm, and timeless, elevating your space without overpowering your scene.
Frequently Asked Questions
How Long Does a DIY Fireplace Makeover Typically Take?
A DIY fireplace makeover typically takes 1–3 weekends, depending on scope. You’ll plan, prep, and finish with careful painting, tiling, or stonework. Follow fireplace design principles and DIY safety tips to avoid hazards and guarantee a polished result.
Can I Remove or Modify a Brick Hearth Myself?
Brick removal techniques show a 60% success rate when you proceed cautiously. Yes, you can remove or modify a brick hearth yourself. Follow hearth modification tips, use proper tools, and prioritize safety, planning, and clean, precise execution.
What Are the Safest Paints for Heat-Exposed Surfaces?
You should choose fireproof paint or heat resistant coatings for heat-exposed surfaces. They endure high temps, resist chipping, and stay stylish. Apply thin coats, follow curing times, and ventilate well to protect you and your space.
Do I Need Permits for Minor Fireplace Updates?
Yes, you’ll likely need permits for any fireplace updates, so check local permit requirements first. Prioritize Fireplace safety, follow code rules, and document inspections to guarantee your project stays compliant and aesthetically refined throughout the process.
Which Coatings Are Best for High-Heat Resistance and Durability?
Heat resistant coatings are best for high-heat areas, and durable fireplace finishes withstand frequent use. You should choose ceramic or silicone-based options, and guarantee proper surface prep; you’ll achieve lasting beauty with heat resistant coatings and durable fireplace finishes.
Conclusion
You stand before your hearth, torch of home re-ignited. Let the mantel be the sun rising on a new room, tiles like stepping stones toward calm, paint a quiet horizon on the brick. Each light a heartbeat, each plant a whisper of growth. The wires vanish into patience, the budget blooms into clever luxury. Your makeover isn’t just style; it’s a memory you’ll warm your evenings with, a symbolic fire that never falters.