A loft with limited headroom forces precise geometry: you’ll need low-slope layouts, slim structural components, and high-performance insulation to preserve usable height. You measure meticulously, map practical zones, and select stair and window strategies that minimize depth loss. The plan must align with regulations and budget, while still delivering daylight and thermal comfort. Keep core calculations, material specs, and approvals tightly documented, because the next step hinges on showing viable space and compliant structure. Ready to quantify the constraints and options.
Define Your Loft Headroom Challenge: Goals and Constraints
Your loft headroom sets the ceiling for usable space and overall design flexibility. You’ll define headroom constraints by measuring clearances, rafter height, and floor joist depth, then translate them into actionable goals.
Establish performance targets for daily use, storage, and potential future adaptation to minimize later rework.
Identify essential constraints: egress, insulation, and fire safety, plus structural limits that affect load paths and span.
Prioritize ventilation strategies early to prevent moisture buildup and draft issues, especially in tight envelopes.
Plan necessary structural reinforcement where required; this may include joist sistering, beam upgrades, or steel insertions to maintain integrity without compromising headroom.
Document decisions, assumptions, and tolerances to guide subsequent measurement and layout efforts.
Maintain a disciplined, data-driven approach for predictable outcomes.
Measure Accurately to Map Usable Space
To map usable space, you must measure with exactness and consistency, because small errors compound into misfits later. You’ll establish a baseline by recording floor plans, wall planes, joist locations, and ceiling contours with a calibrated laser or steel tape.
Measure at multiple points along every axis, noting differences between perimeters, bulkheads, and trusses. Document door swings, hatch access, and potential obstructions that affect clearances.
Convert irregular dimensions into an accompanying grid, then verify by cross-checking with on-site references and three independent measurements.
Prioritize practical usage by reserving space for decorative lighting layouts without impinging on headroom. Plan storage solutions concurrent with spacing decisions to avoid retrofits, ensuring access, ventilation, and service routes remain unobstructed.
Maintain a precise record to support subsequent design decisions.
Choose Low-Slope Solutions to Maximize Ceiling Height
Choosing low-slope layouts helps you maximize ceiling height by simplifying room geometry. You’ll prioritize designs that reduce vertical obstructions, enabling more clearance under eaves and across the room.
Start by evaluating corridor and sleeping areas for low-slope options that preserve usable volume and ease of access.
Low-Slope Room Layouts
Are you maximizing usable space in a low-slope room by prioritizing ceiling height? Prioritize geometry that preserves headroom along the primary axis. Use a rectangular footprint with short, straight runs to reduce intrusive bulkheads. Align structural elements to minimize slope interruptions, and consider a single, continuous ceiling plane where possible.
In circulation zones, place doors, wardrobes, and fixed furniture along higher-perimeter walls to avoid reducing clearances. Select low-profile fixtures and built-ins to maintain perceived height, and employ integrated lighting to emphasize vertical planes.
For aesthetics, apply restrained color schemes that reflect light and reduce visual bulk, coupled with decorative accents that reinforce scale without crowding. Document decisions with measurements and a cap-ex impact review to ensure predictable performance.
Maximize Ceiling Clearance
Maximizing ceiling clearance on a low-slope roof requires selecting solutions that preserve headroom without compromising structure. You assess roof geometry, choosing low-profile framing, orientated trusses, and flush finishes that minimize intrusion into usable space.
Favor continuous ceiling planes over dropped soffits, and specify shallow rafters with optimized insulation to maintain thermal performance without sacrificing height. For corridor or habitable zones, position skylights or rooflights to avoid glare while preserving vertical clearance.
Decorative lighting is integrated into soffits or wall niches to reduce fixture depth and maintain ceiling height. Ventilation options should be compact and efficient, such as passive intake/exhaust with inline fans, or ducted systems routed along joists.
Validate build tolerances early and document headroom across key stations to guarantee consistent clearance.
Pick Slim Beams, Joists, and Insulation for Tiny Attics
When planning a tiny attic conversion, select slim, high-strength beams and joists to maximize headroom without compromising load capacity.
For beam selection, prioritize high-modulus materials with consistent cross-sections and minimal deflection under design loads. Use engineered timber or plated timber options that meet local code spans and provide reduced depth without sacrificing strength.
Joists should be spaced to balance rigidity and clearance, favoring tighter layouts that still meet floor live-load requirements.
Insulation options matter: choose high-R, low-profile batts or blown-in fills that fit between tapered or nonstandard joists with minimal compressive setbacks.
Guarantee vapor barriers align with local climate and install continuous insulation where feasible.
Verify compatibility with ceiling finishes and mechanical services to prevent thermal bridging or bulging.
Plan Space-Saving Stairs and Access
Consider compact spiral solutions and how they maximize floor space while maintaining safe clearance and headroom.
Plan access point layouts to minimize waste, guarantee light circulation, and align with room uses above and below.
This approach keeps stair geometry simple, installation predictable, and future reconfiguration feasible.
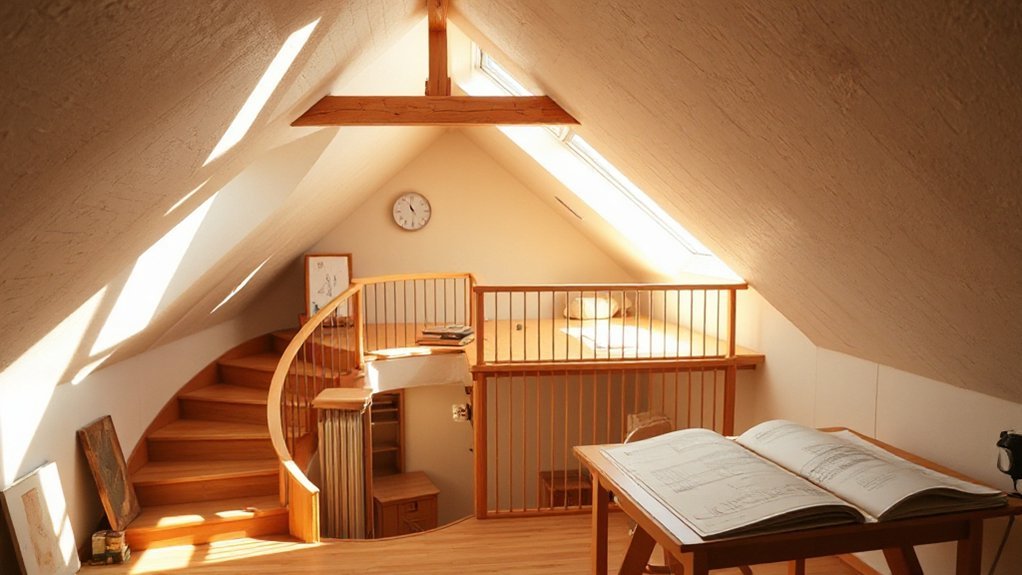
Compact Spiral Solutions
Compact spiral solutions optimize stair access in tight loft conversions by using cantilevered treads, enclosed housings, and central columns to minimize floor footprint.
You evaluate spiral staircase variants that fit within restricted headroom, prioritizing load paths, handrail continuity, and safety riser heights.
Select configurations with stable basal supports and vibration resistance, noting that central columns reduce lateral span and improve alignment with floor plates.
When planning, guarantee access remains unobstructed for furniture movement and service routes; verify clearances around landings and doors.
Integrate compact furniture awareness, reserving knee room and storage within treads where feasible.
Specify finish durability and maintenance access, and document installation tolerances.
Finally, coordinate with structural elements to maintain fire safety, ventilation, and insulation continuity throughout the confined space.
Access Point Layouts
Access point layouts must optimize stair placement and doorways to maximize usable loft area while preserving headroom, clearance, and egress requirements. You should align access with primary traffic routes to minimize obstruction and guarantee compliant widths.
Select space-saving stairs—straight, zigzag, or spiral—that suit ceiling height and structural support, prioritizing shallow rise and modular landings.
Position doors to avoid encroaching on fret margins and to maintain clear egress paths in emergencies.
Consider ceiling beam locations, bulkheads, and existing trusses to avert interference with furniture placement and routing.
Integrate decorative lighting at landings and along corridors to enhance perception of space without sacrificing headroom.
Document all measurements, including floor-to-ceiling heights, to guide future refinements and guarantee safe, efficient access throughout the loft.
Navigate Planning Permission and Building Regulations
When planning a loft conversion, steering through planning permission and building regulations is essential to avoid delays and costly revisions. You’ll identify applicable permits early, then map requirements to your design changes.
Begin with local planning authority thresholds for extensions, and confirm if your project qualifies for permitted development or requires a full application. Check structural criteria, fire safety, insulation, ventilation, and escape routes, ensuring compliance with current Building Regulations and party-wall obligations.
Historical preservation and zoning restrictions may impose limits on height, massing, roof alterations, or use; verify conservation areas or listed-status implications.
Maintain precise records, submit drawings and impact assessments, and schedule pre-application discussions to align expectations. Maintain audit-ready documentation to streamline approvals and reduce revision cycles.
Budget Smartly: Cost-Saving Tactics for Limited Headroom
Smart budgeting is essential when headroom is tight, so focus on scalable, high-impact savings that don’t compromise safety or code compliance. You’ll pursue disciplined Budget planning to align scope with existing structure and allowable load paths, avoiding over-specification that inflates costs.
Compare generic versus engineered solutions, prioritizing modular, adaptable components that minimize changes to framing and services.
Material selection should emphasize weight-conscious, code-compliant options with proven performance in limited spaces. Select light-gauge framing, compact mechanicals, and off-the-shelf fasteners to simplify installation and reduce site time.
Seek pre-finished or readily painted finishes to cut trim labor, while preserving durability. Avoid niche finishes that require special trades.
Leverage standard insulation boards and air-sealing details to maximize thermal efficiency without expensive upgrades. Document unit costs, track changes, and guarantee all substitutions stay within permitted structural and fire-safety criteria.
Maximize Daylight and Energy Efficiency in Small Lofts
Maximize daylight and energy efficiency in small lofts by prioritizing orientation, glazing, and envelope performance to optimize natural light while reducing heat loss. You’ll balance south-facing exposure for cooling- or heat-savings potential with shading strategies to avoid glare.
Use high-performance glazing with low U-values and solar control where appropriate, and couple it with reduced internal reflectance losses through careful placement of interior partitions.
Select roof materials that minimize heat gain and support dimmable daylighting, ensuring water resistance and long-term durability.
Incorporate mechanical ventilation options that provide adequate air exchange without compromising insulation. Seal gaps around service penetrations, upgrades to airtight doors, and continuous insulation at the envelope.
Address cooling needs with passive strategies and, when needed, energy recovery ventilation for improved efficiency.
Frequently Asked Questions
Can a Dormer-Free Loft Still Feel Spacious With Low Headroom?
Yes, you can feel spacious with low headroom. Consider dormer alternatives and low ceiling solutions like strategic lighting, reflective surfaces, and slim storage. You’ll optimize layout, maximize usable height, and preserve flow without compromising structural integrity.
What Are the Best Storage Ideas for Sloped Ceilings?
Suspense grips you as you plan: use creative lighting and custom furniture to maximize sloped-ceiling storage. You’ll install built-ins along the low wall, leverage under-eave niches, and choose compact, modular units for precise, utilitarian organization.
How Does Insulation Impact Usable Floor Area?
Insulation efficiency reduces usable floor area only marginally, since thicker insulation raises joist spans and reduces height. Prioritize high-density, low-thermal-mass materials; optimize roof vents. Thermal performance improves with airtight details, minimizing gaps and moisture risk across the insulation envelope.
Are Skylights Worth the Cost in Tight Lofts?
Skylights are worth it in tight lofts when you gain daylight and perceived space; you’ll want natural light and consider structural support. You’ll evaluate framing, corrosion resistance, and load paths to guarantee safe, efficient installation.
What Are Hidden Costs Beyond Planning and Build?
Cost overruns and planning permissions are hidden costs beyond planning and build you should anticipate; you’ll need contingency budgeting, professional fees, surveys, party wall and access arrangements, utility relocations, and potential services upgrades to avoid surprises.
Conclusion
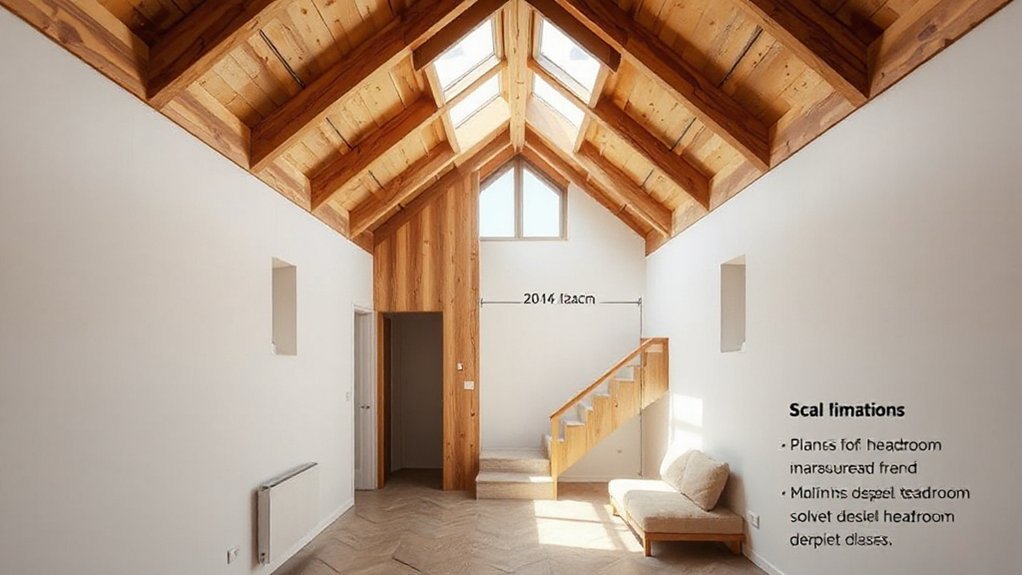
You’ve mapped the limits and mapped the gains. With precise measurements, low-slope strategies, and slim structural components, your loft stays usable without sacrificing light or comfort. When headroom tightens, think stair efficiency, daylighting, and tight insulation—the trifecta that preserves space and performance. Here’s a story: a 1.2 m ceiling dip became a design cue, not a constraint, guiding a slimmer beam layout that saved valuable inches. Your project can finish lean, legal, and livable.